It’s always a good idea to read through a pattern completely before starting. Sometimes an instruction further into a pattern will help clarify something you didn’t quite understand earlier in the pattern. Reading through the whole thing also helps you work faster once you start sewing because you’re somewhat familiar with the process already.
THE ENVELOPE
Store bought patterns come in an envelope. This will usually have a picture of the finished product from different angles on the front, as well as basic information on the pattern. The back of the envelope provides measurements and sizes, a list of materials needed (including notions and how much fabric to buy), and a more detailed description of the pattern.
If you’re using a PDF pattern it should contain all of the same information at the beginning of the pattern, because there is no “envelope”.
LABELING
Shown below are the pattern pieces for the Fox Scrapped Animal. Every piece is marked with the company name (Yellow Spool), and the Pattern Name (FOX). Each piece is also marked with it’s specific piece name (body, ears, nose, etc.) and cutting instructions (cut 1, 2, 4, etc.).

<
Big pattern companies have a numbering system that is also marked on their patterns and envelopes.
CUTTING
Some patterns (i.e. clothing patterns) will have a scale of various sizes in one pattern piece. Rather than cutting down to the smaller sizes, it’s smart to use tracing paper (I personally like table paper) to trace the smaller sizes so you don’t lose the larger sizes in case you want them later.
The bold, outer line is the line to cut along. Dotted lines usually indicate specific instructions. For instance, the Scrapped Animals have a long rectangular side piece that measures 32″ long. Because that’s much longer than a piece of paper, I’ve put the cutting instructions for that piece inside of a dotted line to indicate that the box itself is not the pattern piece.
Dotted lines are also used within a pattern piece to show placement. The Snail Shell has a hand-stitched spiral that is indicated with a dotted line, and the Duckbill Platypus has a large beak sewn to the center of it’s face, which is also indicated with a dotted line to show placement. Dotted lines are not to be cut out unless indicated in the pattern instructions.
When a piece is perfectly symmetrical, you are sometimes instructed to cut it out on the fold. This saves pattern space, and makes for less cutting. It is marked with an arrow-bar pointing to the side of the pattern that should be lined up at the fold.

Commercial patterns usually have diagrams showing the best cutting layout for you. That diagram will be marked with the selvage, folds, and direction of grain.
MARKINGS
Notches are little triangular markings on some pattern pieces showing where to line certain pieces up together. If there is more than one place on a pattern that needs notches, you get double notches, triple notches, and so on.
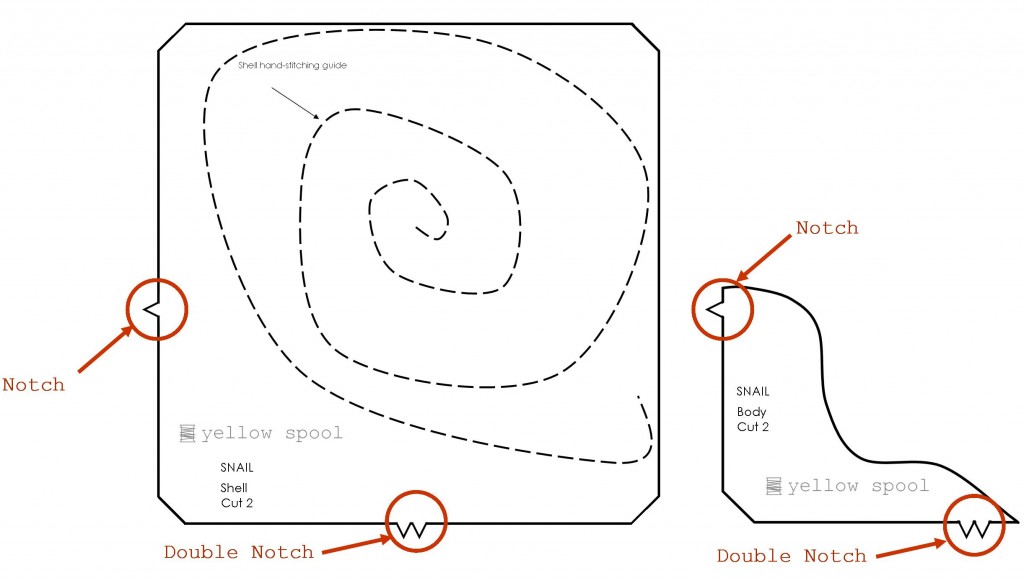
The notches on the Snail Scrapped Animal pattern show where to line the body with the shell.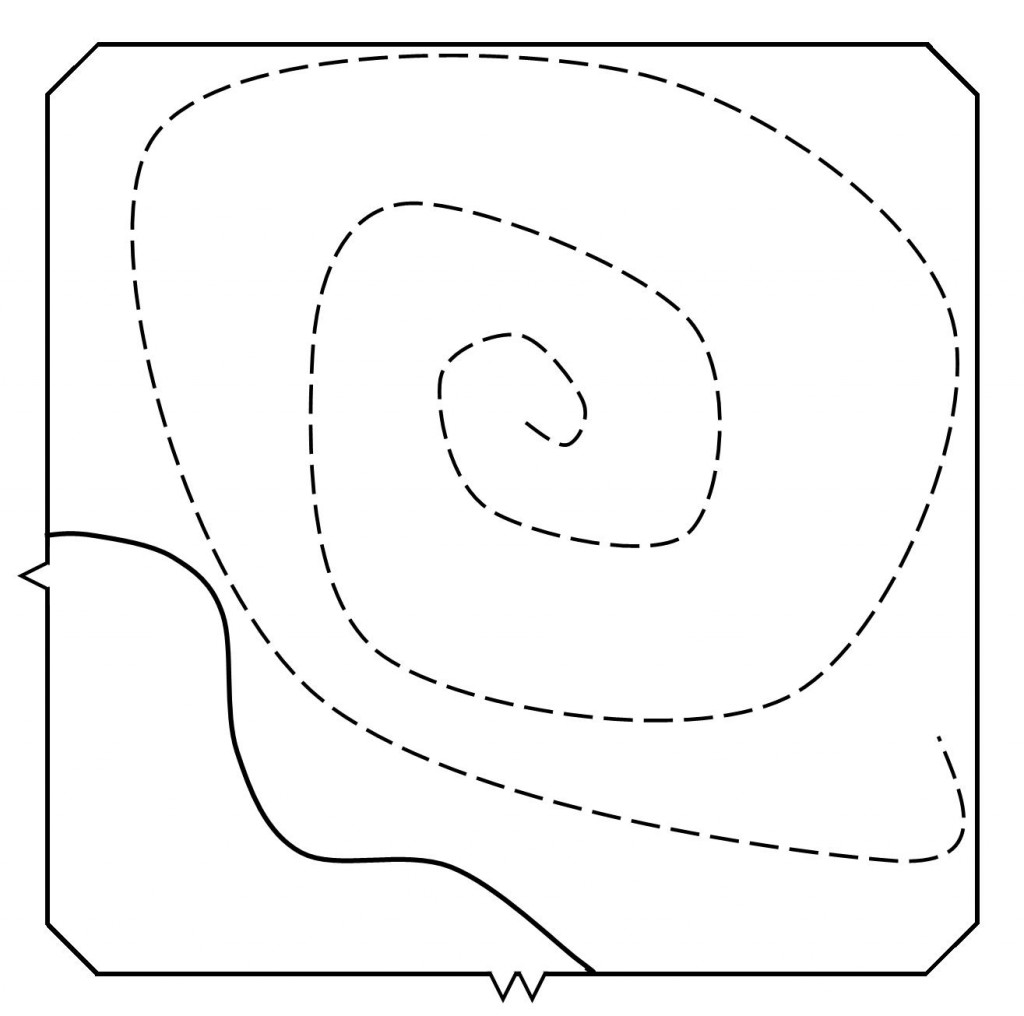
If a pattern has other marking it should have a key explaining what they mean.
PATTERN INSTRUCTIONS
Patterns are written in step-by-step instructions. In addition to written instruction, images are provided to help you visualize as you go. Large, commercial pattern companies show their steps with drawn images, while most small, online pattern companies choose to show their pattern instructions with photographs.
COMMON TERMINOLOGY
Right side of the fabric- The right side of the fabric is the side that you want seen when the project is finished. Sometimes the colors are more bold on the right side of the fabric. Patterns will tell you to line pieces up with the “RIGHT SIDES TOGETHER” or with “RIGHT SIDE UP”.

Wrong side of the fabric- The wrong side of the fabric is the side that you want to hide when the project is finished. Sometimes the colors are dull on the back side of the fabric. Patterns will tell you to line pieces up with the “WRONG SIDES TOGETHER” or with “WRONG SIDE UP”.

Seam allowance– Some patterns show a dotted line for the seam allowance, others simply give you instructions for the seam allowance. If a pattern is sewn with a 5/8″ seam allowance you should line the edge of the fabric at the 5/8″ guide on your needle plate as you sew. It leaves a 5/8″ (or whatever seam allowance you use) space between the stitching and the edge of the fabric.

HOMEWORK
