I’m shy. Being so, I hate applying for jobs. When I was in high school I needed to find an after school job, but secretly hoped some store manager would come knocking on my door and recruit me. I dreaded the thought of putting myself out there, until my dad told me, “You won’t get a job you don’t apply for. So go fill out some applications.” And yes, I’m focused on our lesson here, I promise. See, a lot of people want to sew, but they are white-knuckled terrified of cutting out their fabric. If you can’t do step 1, how will you get to step 2? So wipe those clammy hands off on your pants, and let’s get started.
PRESHRINK
The first thing you should do in preparation for a new sewing project is to preshrink your fabric. I’m a big believer in this. Some fabrics shrink, some don’t. Sometimes it can be hard to tell, so why not get any shrinkage out of the way before you start! There’s hardly a more tragic sewing ending than to make something wonderful, only to have it shrink the first time you wash it.
Depending on the fiber content of the fabric you’re working with, you’ll have different care/laundering instructions. If you’re unsure how to wash a specific fabric that you’re interested in buying, ask an employee, they should be able to find the care instructions for you if it isn’t marked on the bolt.
PRESS
Fabric washed and dried – check. Now it’s time to quickly iron your material if it needs it. Again, do this according to the care instructions for your fabric. If it’s delicate, you don’t want a high temperature setting to melt your fabric. Most irons have the settings marked to help you (cotton, silk, etc.). True, your fabric will probably just get wrinkly from working with it as you sew, but ironing before you cut out a pattern is important. If you skip this step, those big wrinkles could make your pattern pieces the wrong size.

CUT
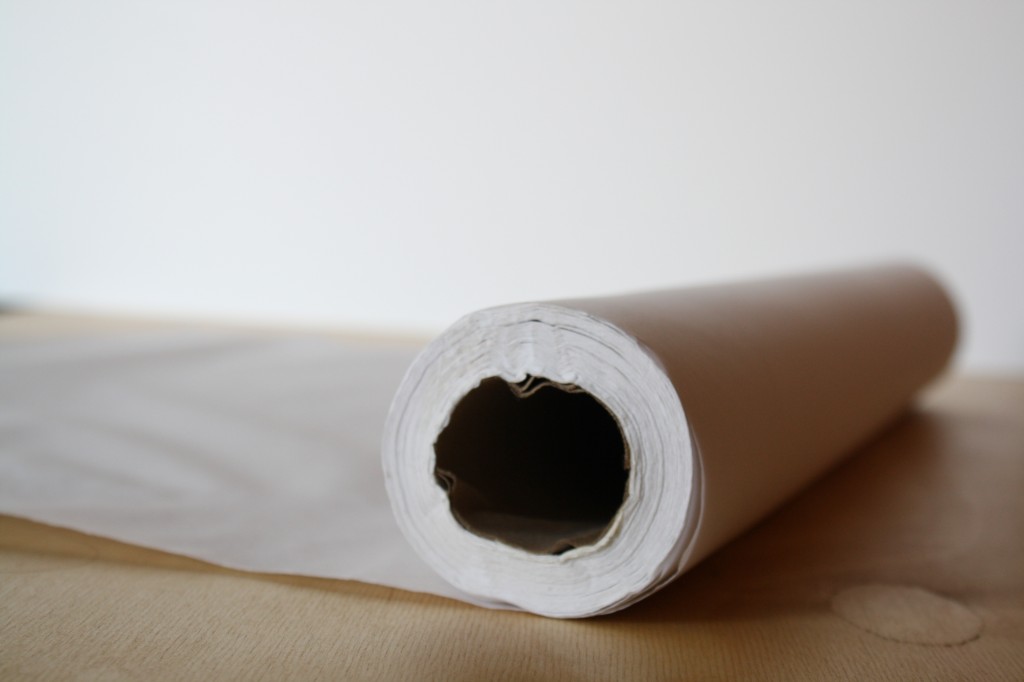
And now, the moment you’ve been waiting for… cutting out your pattern pieces. EEEK! First, cut out the paper pattern using paper scissors, because your nice fabric shears (if you chose to invest in them) will be dulled by paper. If your pattern has multiple sizes, and you need one of the smaller sizes, I’d suggest tracing it, rather than cutting the pattern down. That way you can use the pattern again for the larger sizes if you ever need to. I keep a roll of table paper on hand for my patterns. Table paper is the crinkly stuff you sit on at the doctor’s office. You can get a large roll that will last you nearly forever for a really reasonable price. Just check out your local medical supply store (you have one nearby, even if you don’t know it).
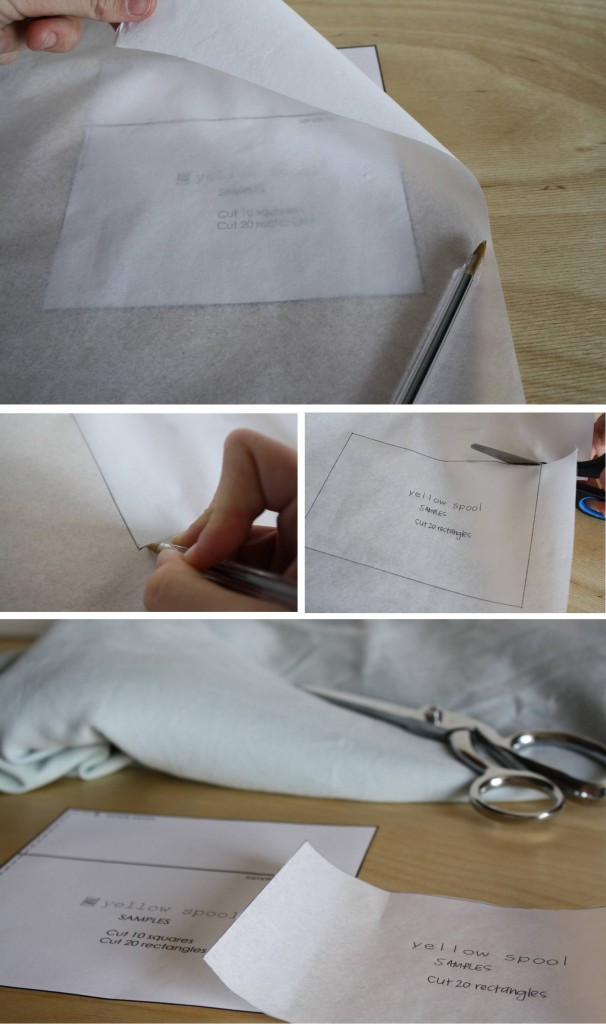
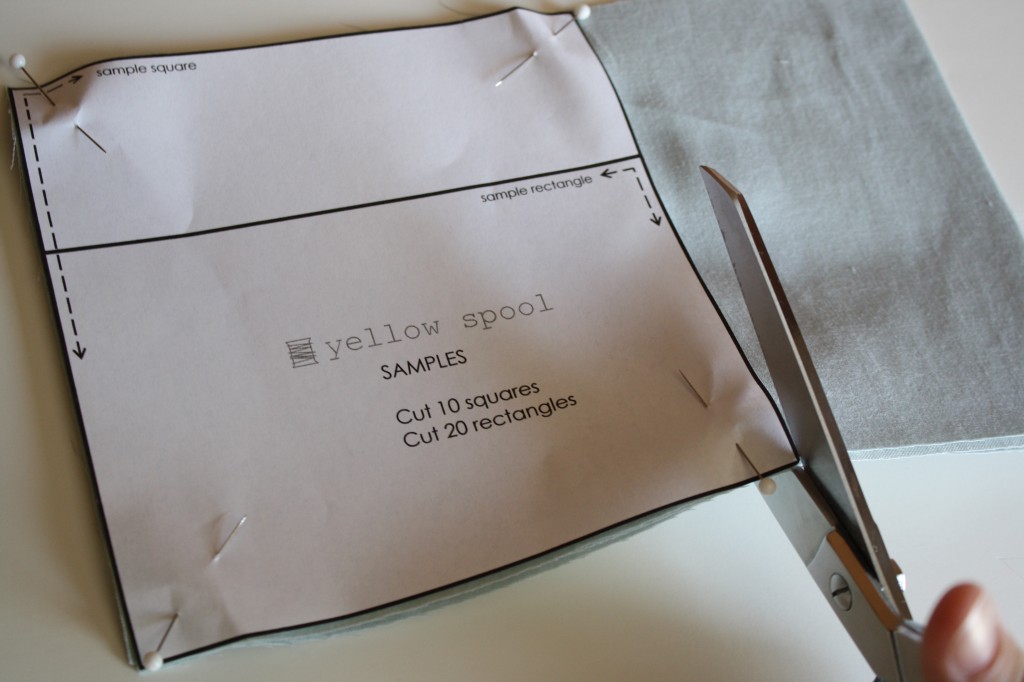
With your paper pattern cut out, pin it to your fabric and cut around the bold outer line using your shears. If a pattern says “cut 2” just fold the fabric in half, and cut out both layers at the same time.
For a straight edge cut, a rotary cutter, ruler, and cutting mat come in handy. It’s certainly not necessary though, if you’re just starting out.

That’s it. Wash, press, and cut. Sometimes that’s half the battle.
And one more thing…
Remember when we talked about grain? Most woven fabrics can be ripped on grain if you snip into the fabric and tear with both hands. This just helps get that edge on grain to assist in cutting your fabric out. Sometimes you can even use this method if your pattern requires strips or squares of fabric.

HOMEWORK
