For the last seven years, our family has hopped around twelve times. Twelve. We were moving every six months or so, and when your life is that transitional, you don’t exactly let yourself root in anywhere and make meaningful connections with people. I was getting by on friendly smiles and small talk, essentially, for years. That is, until this last move, This time, we knew we’d be staying put for two years. For the first time since college, I allowed myself to get to know people – to be vulnerable. I invested myself into new relationships, and let me tell you, it’s been good for the soul. It has felt real. Raw, even.
One of these new, deep-rooted friendships had been on my mind a lot. She was going through some difficult circumstances, and even amongst her own pressures, she was making time for me, and for my children. She’s a good egg, this one.
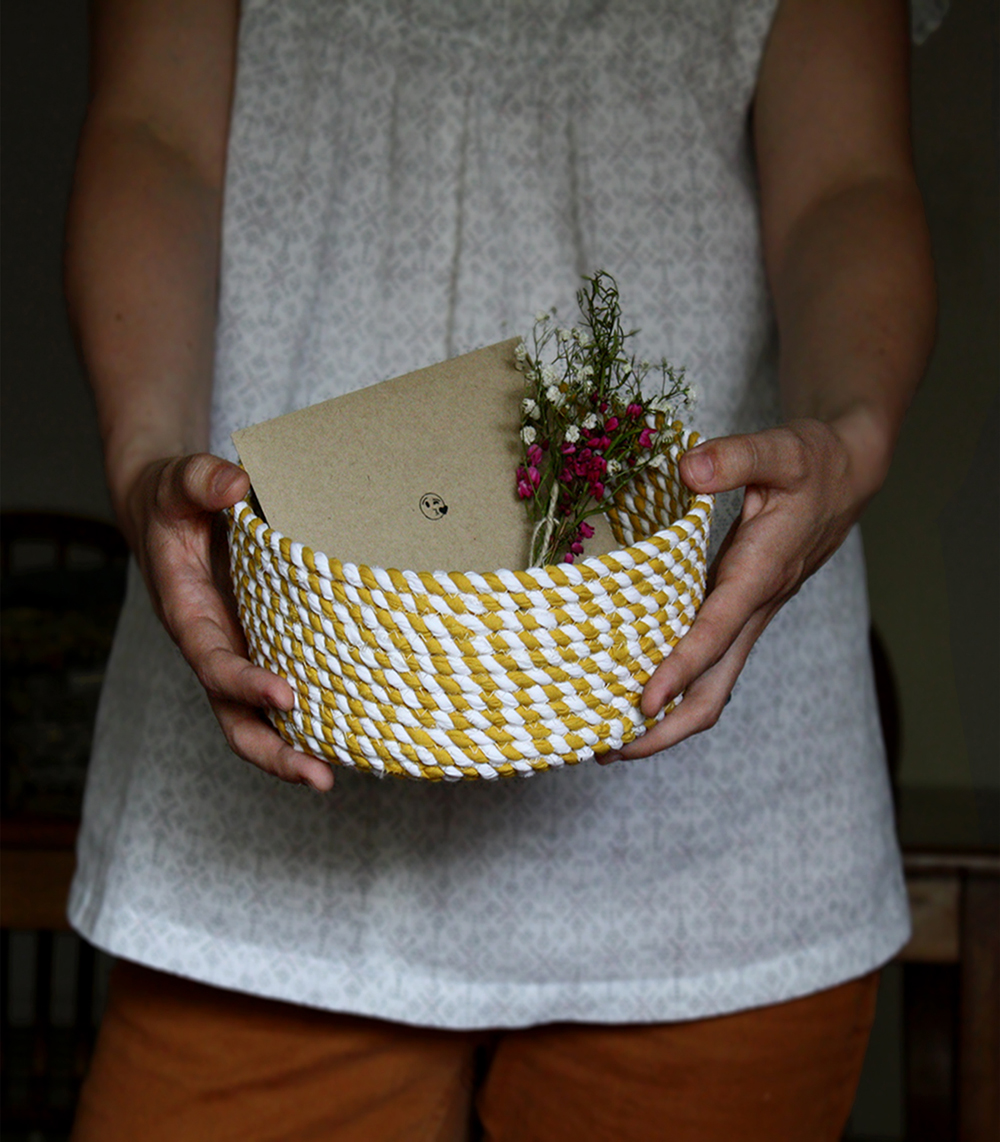
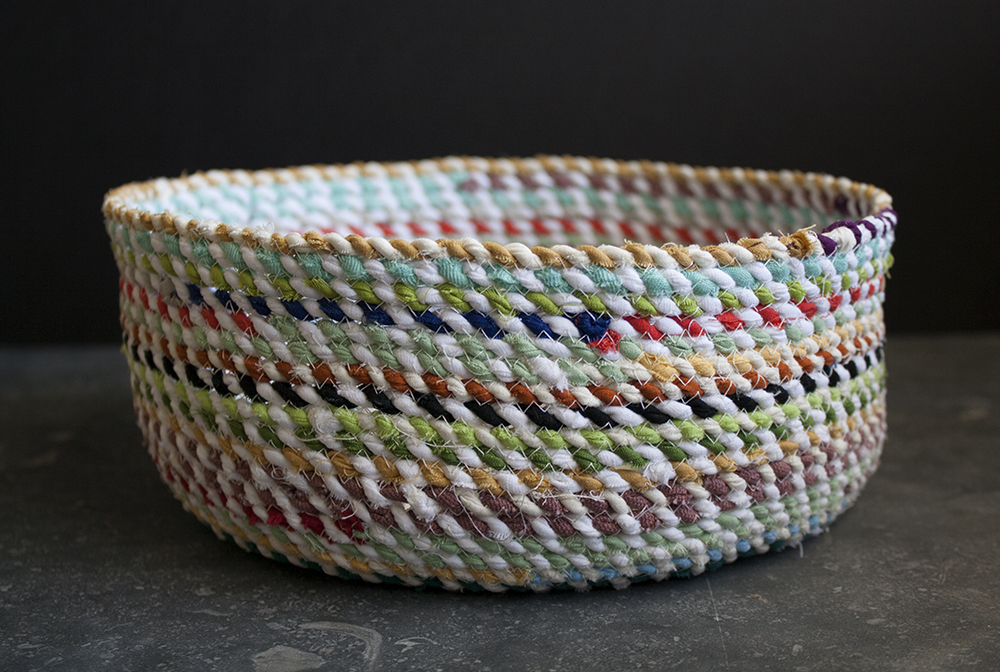
Sometimes there’s just no better way to express your gratitude for a person than to put pen to paper and tell them in a note. And even then, sometimes words come up short. When this happens, you make a simple basket to hold said note, as a gesture of thoughtfulness and hope that they understand what you’re trying to say.
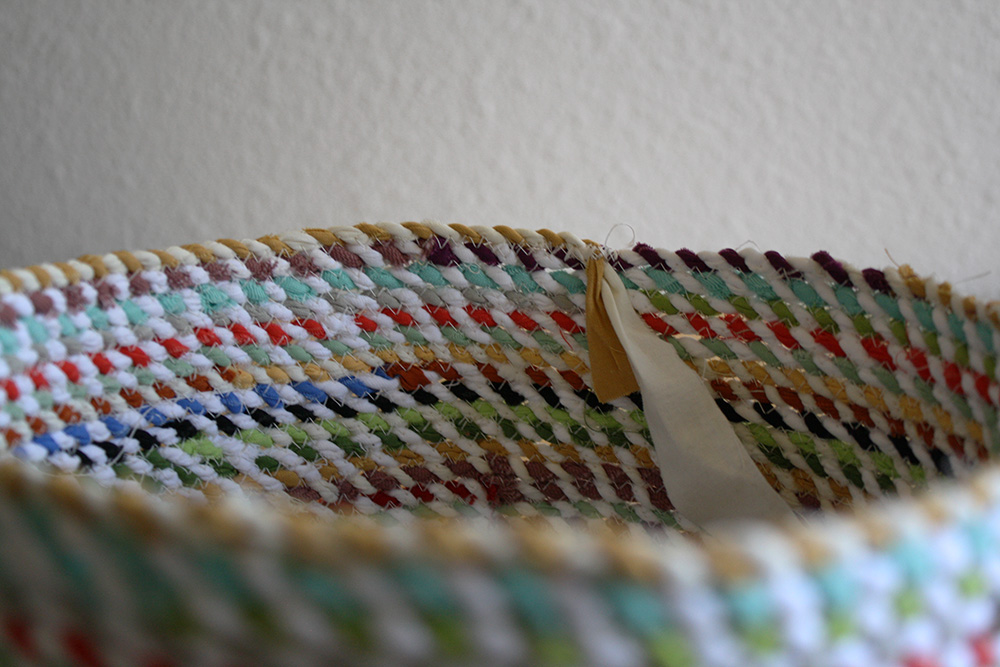
I recently shared with you how to make your own rope using fabric remnants, and today I will be showing you how to use that rope to make a basket (or a coaster/hot pad/rug, whatever).
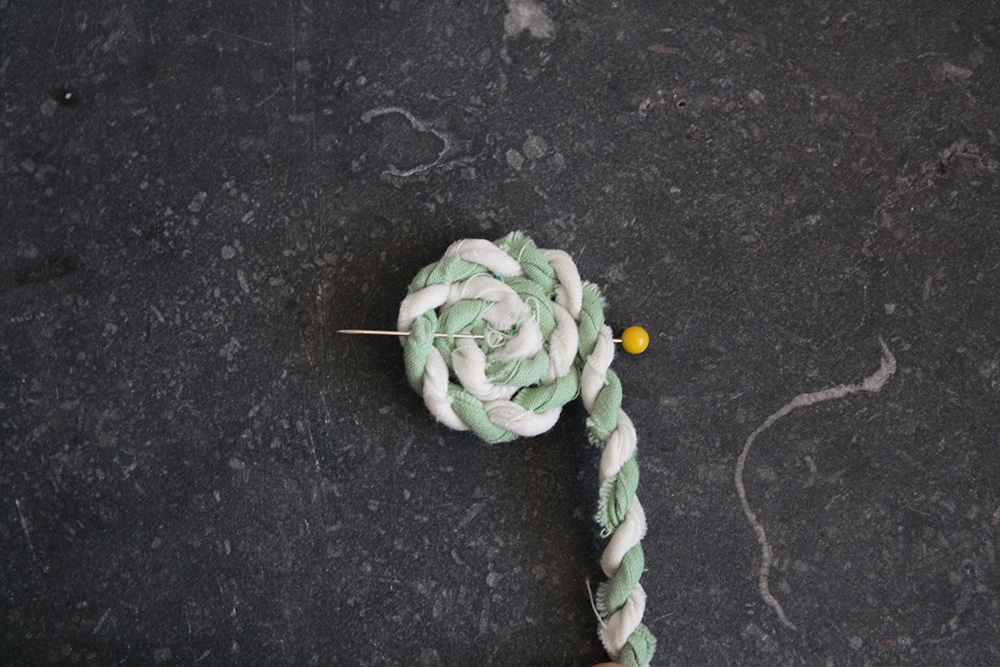
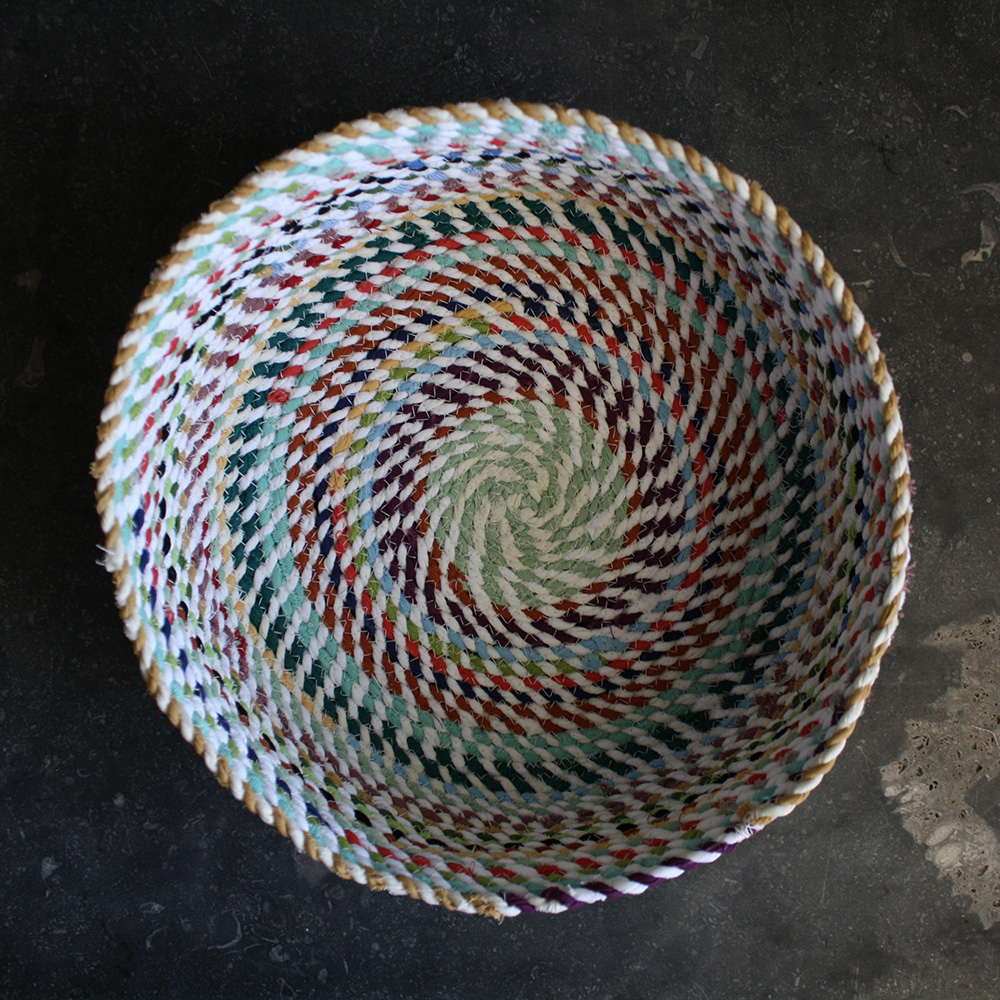
1. Start by coiling the end of the rope until there is about a 2″ diameter, and pin through all the layers of the coil. Sew a large X across the coil, to hold it in place. This will just make the beginning of the process a bit easier to sew in the next step.
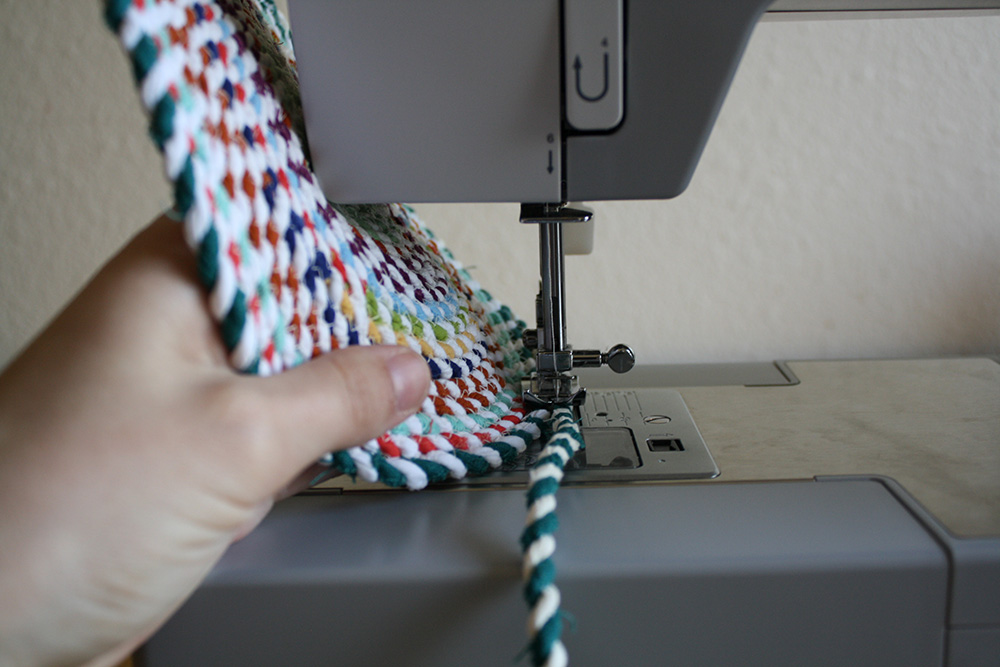
2. Set your sewing machine to a zigzag stitch. With the tail of your coil coming down from the right (pictured above) begin sewing the coil together.
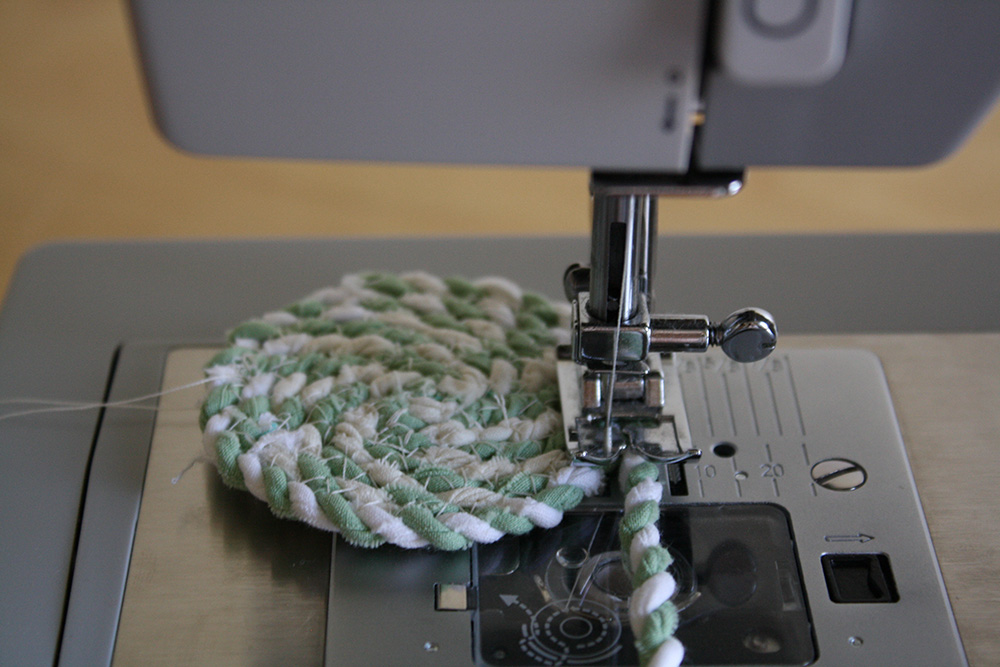
If you are using handmade rope, it might have a bit of stretch to it. In order to keep the basket flat, you will want to twist the rope tighter, if possible, as you sew. This won’t be applicable with store-bought rope.

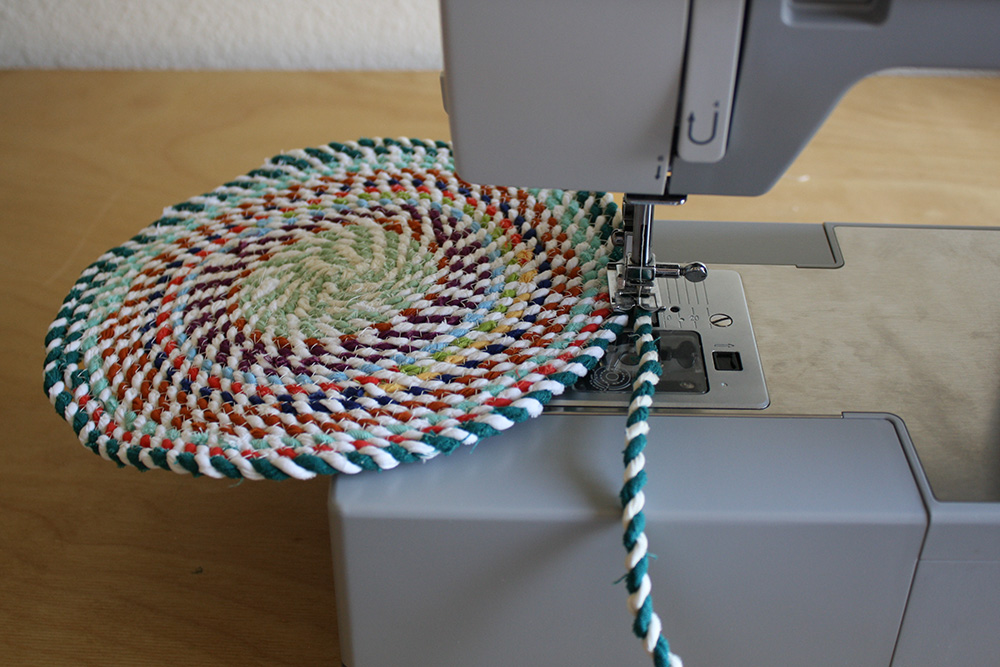
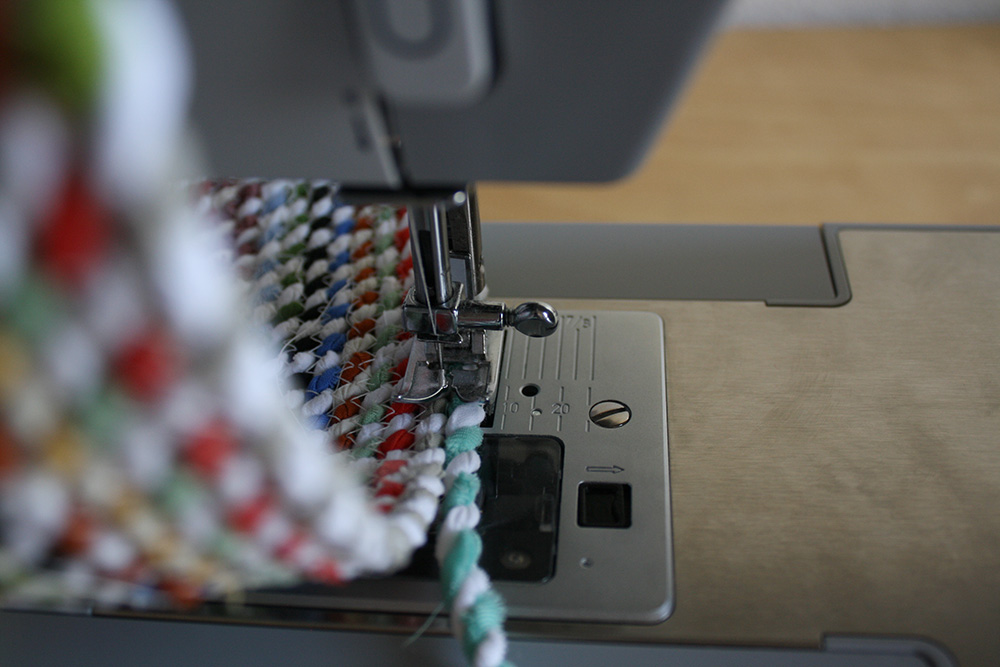
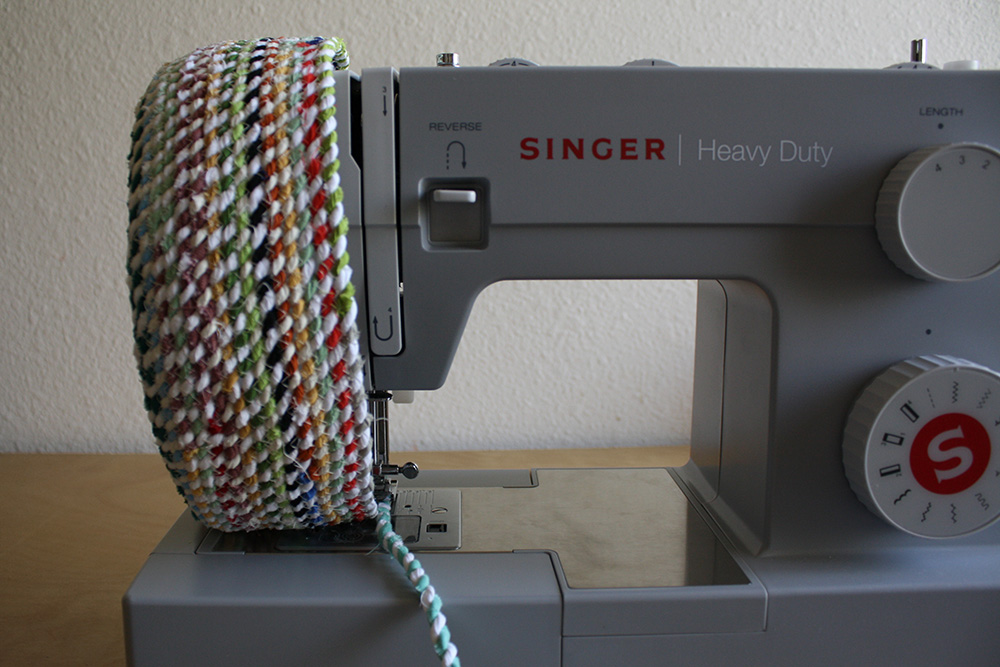
3. When the base of the basket is the size you’d like, tilt the entire base onto its side and continue sewing in the same way. This will form a lip and begin the sides of the basket.
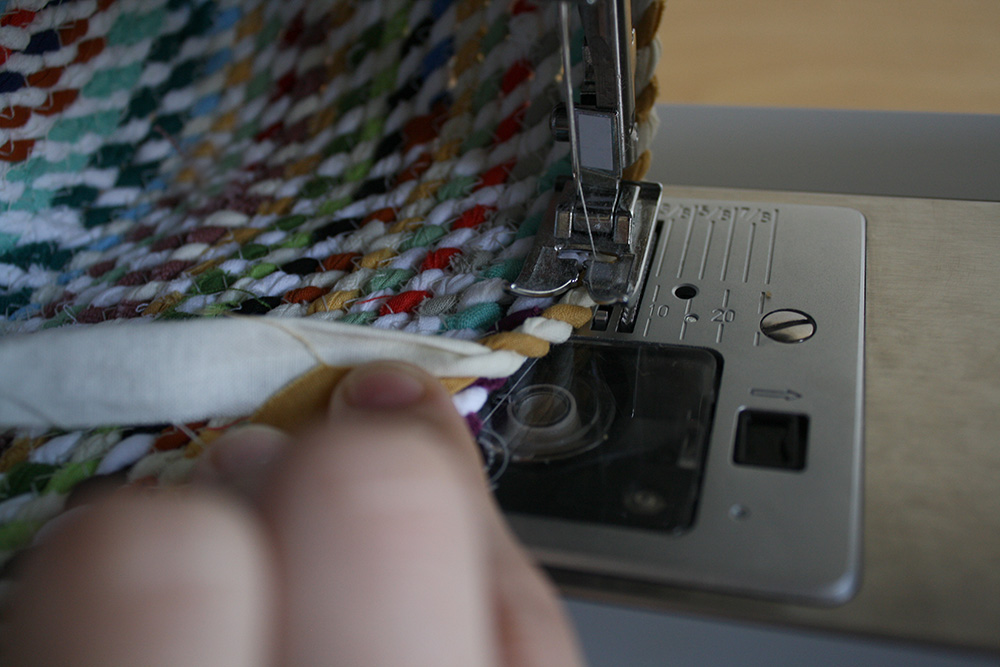
4. When the basket is as tall as you’d like it, tuck the rope tail into the basket and sew back and forth over the end a few times. Cut off the excess rope.
Steps 1 & 2 can be used to make coasters, hot, pads, or even a rug. If you run out of rope, you can always twist more onto the end as you go.
Who doesn’t love a great basket? And they make for lovely gift baskets, too!
I just found you via sewing.craftgossip.com. I love this post; it’s so me. I cannot wait to explore your blog.
What tension and stitch length, etc. settings are you using?? I have an old Kenmore gear-driven machine that may be able to handle this thickness, but need some pointers to sew it as neatly as yours!