This has been one of my most popular posts, so I’m revisiting it today, even though I realize Christmas is in four days and it’s a little late in the season… woops.
A nativity set is one of the fundamental Christmas decorations. Problem – most of them are fragile, and my little hooligans have Inspector Gadget hands that would manage to destroy a ceramic nativity no matter how high I put it. So I set out to find a way to make a simple wooden nativity, and it turned out better than I had even hoped!
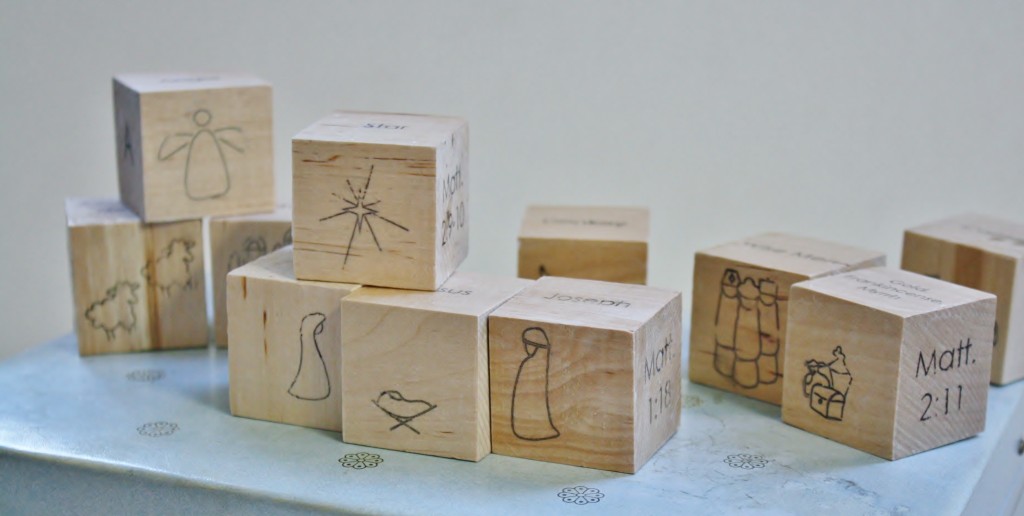

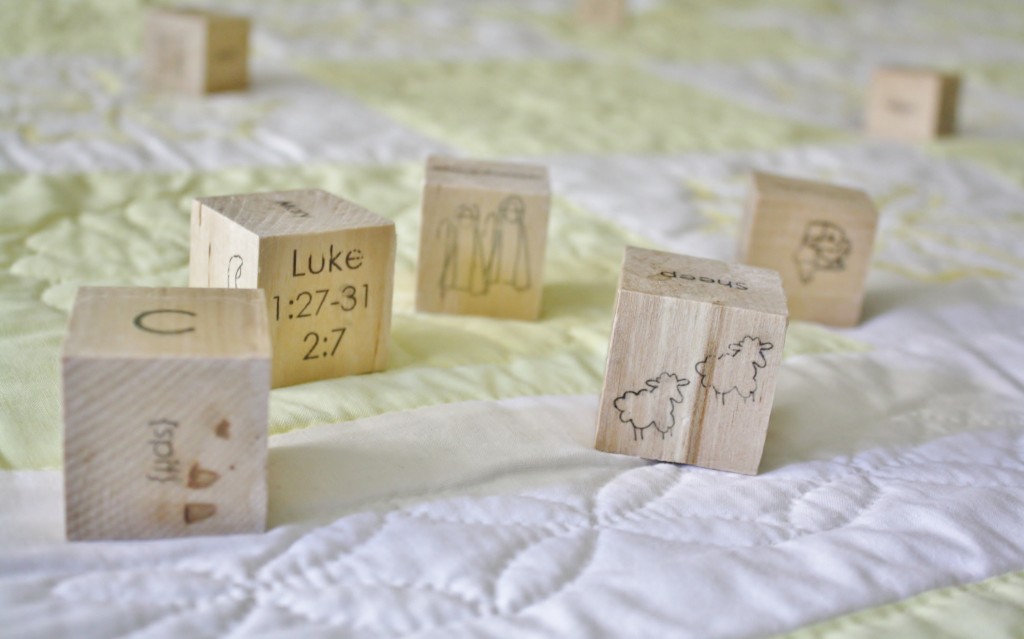
Not only is it durable, but it can also be used as a learning tool to help teach my kids more about the nativity as they play.
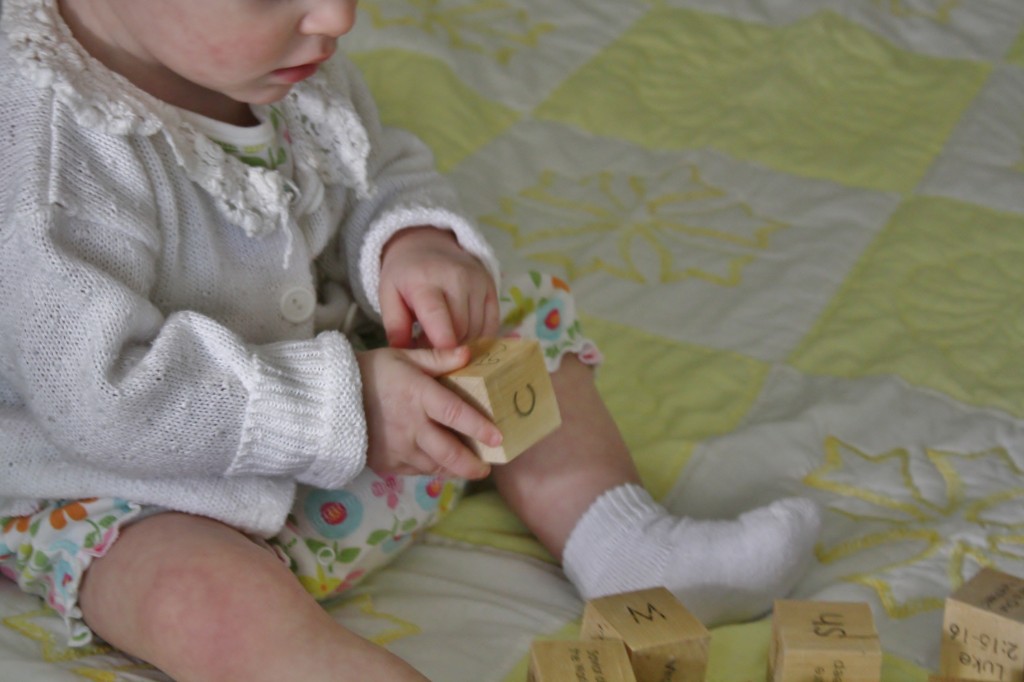
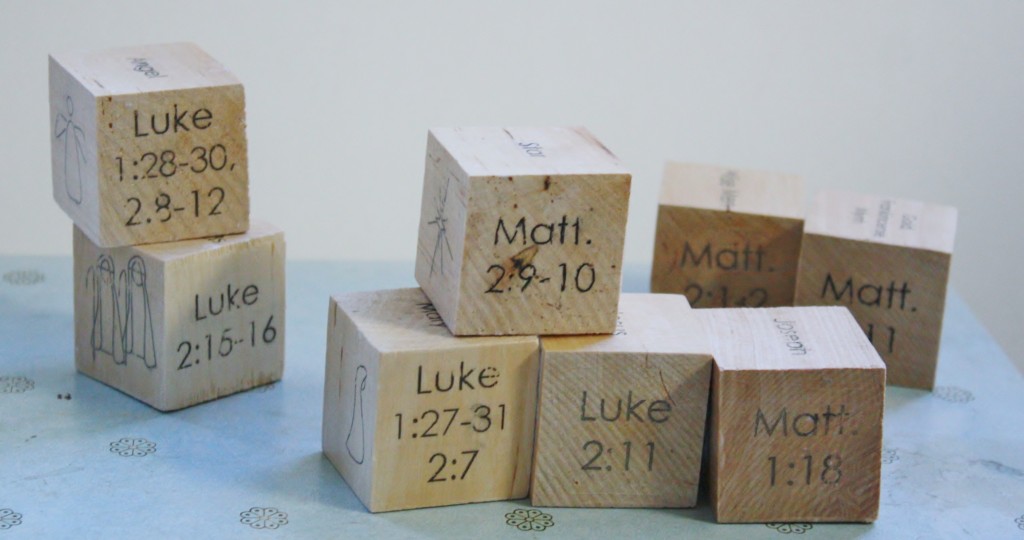
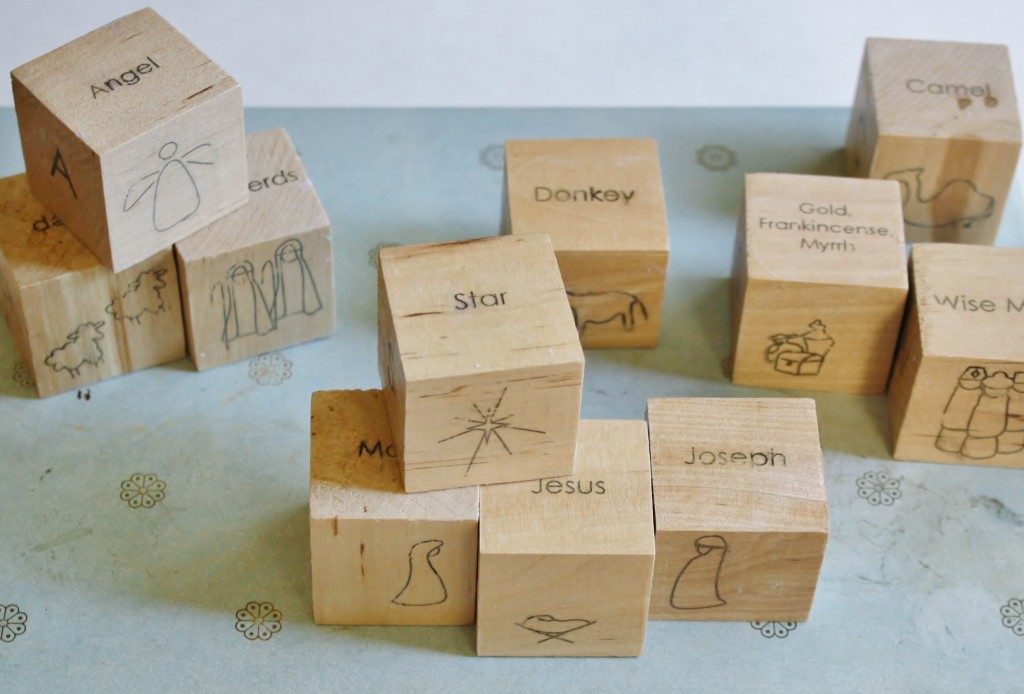
Each piece has six different parts (one on each of the six sides of the block): an image, title, block letter, description of their role in the nativity, scripture reference(s), and a characteristic or fact.
When I decided what I wanted to do I turned to google for a simple method to transfer a printed image onto wood. Bingo. The tutorial found HERE was exactly what I was looking for. I did have to make a few adjustments because my hp printer doesn’t have waterproof ink like her epson does, and I was going to be printing images onto all six sides, rather than just one, but it still worked well.
MATERIALS NEEDED
nativity template FOUND HERE.
white cardstock
foam brush
washable Elmer’s glue
1 1/2″ Wooden blocks (the nativity is 11 pieces, but get a few extra to practice on)- I got mine at Hobby Lobby, they come in sets of 6
Mod Podge
inkjet printer
INSTRUCTIONS
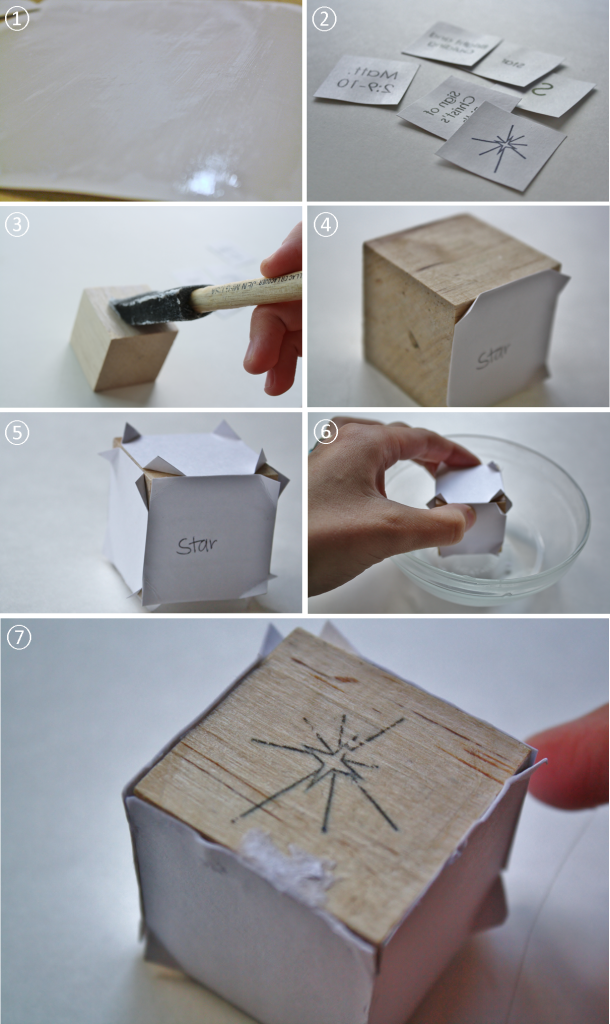
① Using your foam brush and Elmer’s Glue, coat 3 pieces of cardstock with a thin, smooth layer of glue. Just glue one side of each page. Let it dry. I was super nervous about running glue through my printer so I let mine dry overnight, but it looked ready after about 2 or 3 hours. If you’re nervous about this, I bet transfer paper would work instead of the Elmer’s glue method.
② Print the mirror-imaged nativity template using an inkjet printer, with the image printed onto the glued side of the paper. Each piece of the nativity is organized into columns, so cut out the pieces for your first block.
③ Coat one side of your block with a thin layer of Mod Podge and press your image with PRINT SIDE DOWN onto the Mod Podge. Hold it firmly in place for about ten seconds.
④ Label your first piece to help keep track of the direction the images are in on your block, and fold the corners out to help you peel the paper away after it’s dried. Don’t peel it off yet.
⑤ Prep all six sides of the block and let it dry for 12 hours. You may want to test one block before you do the entire nativity set, in case you need to make some adjustments. I did.
⑥ After it’s sat to dry for 12 hours, peel away each piece of paper. My printer (hp) doesn’t have waterproof ink, so I tried to do as much of it without water as possible, but you can try dipping it in water before you peel the paper away to see how your ink holds up, water makes it easier to peel.
⑦ If you have any stubborn paper residue just get it a little bit wet and use your fingertip to peel it off.
If it works how you’d like, do the same thing to the rest of your nativity pieces, and your nativity is ready to play and display. All in all, it takes about a day, but almost all of that is wait time for the elmer’s glue and mod podge to dry, the actual work is really quick and easy.

click here for the mirror imaged nativity pdf
click here for the original nativity pdf
Quick question for you all: I have access to a laser engraver that could engrave these images onto the wooden blocks, and I’ve toyed with the idea of making some to sell. Do you think there’s a market for that?
these are gorgeous – I just you could also print the things onto paper and then modgpodge them on that way too.
Your blocks are sweet! Pinned them:) I posted
http://www.sewsweetvintage.com/2012/11/reversible-holiday-note-board.html
Stop by for a visit:)
Love it! Turned out so beautiful. Funny, we just made a wood block nativity using shapes that I will post in a day or two.
I would love for you to add this to my link-up, Mom’s Library!
Thanks and be blessed,
Julie @ Hey Mommy, Chocolate Milk
http://heymommychocolatemilk.blogspot.com/2012/11/moms-library-link-up-7-for-me.html
I love this idea! My kids always want to play with our nativity set, but since it is made of ceramic, that just get to look. I would love for them to have a set to play with.
That is amazing! It looks so neat and professional. I totally want to try this! Thank you.
I love the natural look of these. Lovely :)
I am so excited to see this! I pinned it 2 years ago and was very disappointed last year when I couldn’t find it…Thanks for reposting!
I need you to make these so I can buy them :) Laser engraved would look really good. If you do, please let me know. Cute idea!
This is brilliant and beautiful! I absolutely LOVE it! Thank you so much for linking up with Creative Me at The Southern Institute this week. I’m so glad you did. :) I’m pinning this to my Holiday Projects board.
Oh my goodness, I’m in love with these. Pinning.
I absolutely love these! And I think they would sell really well as engraved blocks and if you create some, I’d love to purchase some. =)
Those are so cute! Mine are all older this year, but I’ll have a nearly one year old next year….pinning these so I remember!
I’m a market for these! (Wait, can one person be a market?) If you decide to make and sell, PLEASE let me know! Awesome idea!
this is such a good idea. I really want to have a cute nativity that isn’t too fragile. I’m so keen to try this out!
This is great! I’m so glad you reposted this tutorial. I am pinning it and will hopefully be able to make it before too long.
Those are wonderful! I love this idea.
This is way awesome! I have blocks from Pick your Plum I could use! Thanks for sharing at Show & Share, featuring this tomorrow!
These are so sweet! thanks for linking up!
Kim
wow! That’s pretty amazing… very creative. I’m so glad you’re teaching your kids about the real meaning of Christmas!! So important. Featuring this today.
Hey Stacie! I’ve never heard of the elmer’s glue method, but I’ve got something else you can try out in a similar vein. If you mirror-image print on a laser printer, you can use a Chartpak brand clear blender marker (sold at most craft or art stores, or for a few dollars online) draw on the back of the paper very similar to here, burnish the design a bit with a bone tool or your fingernail, lift the paper off, and voila, instant transfer! The nice thing there is it can be used on fabric as well, because the marker itself doesn’t leave any residue (it might spot delicate fabrics, but I used this technique to get a design onto a fabric book cover I did a while ago for a friend)
It’s worth a trying out, and I think you’d come up with all sorts of spiffy ways to put it to use.
We should call each other sometime, it’s been a while :)
So have you decided to make them on an engraver to sell? I would be interested. Let me know how much.
Dona
Hey, you used to write fantastic, but the last few posts have been kinda boring I miss your great writings. Past several posts are just a little out of track! come on!
If some one wishes expert view regarding blogging afterward i suggest him/her to go to see this blog, Keep up the pleasant work.|
I have noticed you don’t monetize your website, don’t waste your traffic, you can earn additional bucks every month because you’ve got hi quality
content. If you want to know how to make extra money, search for:
Ercannou’s essential tools best adsense alternative
I have checked your website and i’ve found some duplicate content, that’s why you don’t rank high
in google’s search results, but there is a tool that can help you to create
100% unique articles, search for; Best article rewritwer Ercannou’s essential
tools
Helpful information. Fortunate me I found your website by chance, and I’m shocked why this twist of
fate didn’t happened earlier! I bookmarked it.