Understanding a little bit about your sewing machine, and how it works is the first step to sewing. When I was student teaching, I taught sewing to 7th graders. They were heartbroken when they realized they had to be able to name and locate the different parts of their machine before they could hear the sweet roar of that needle, pedal to the metal, stitching like a pro! The truth is, you’ll have this and other resources to turn to if and when you do get stumped at the sewing machine, but it’s best just to learn it first.
Each machine is a little bit different, depending on the make, model, and year. I will show you the very basics that most machines have using my own machine, and hopefully you will be able to locate everything on your machine as well. Here is a diagram of the twenty parts of the machine that we will go over:
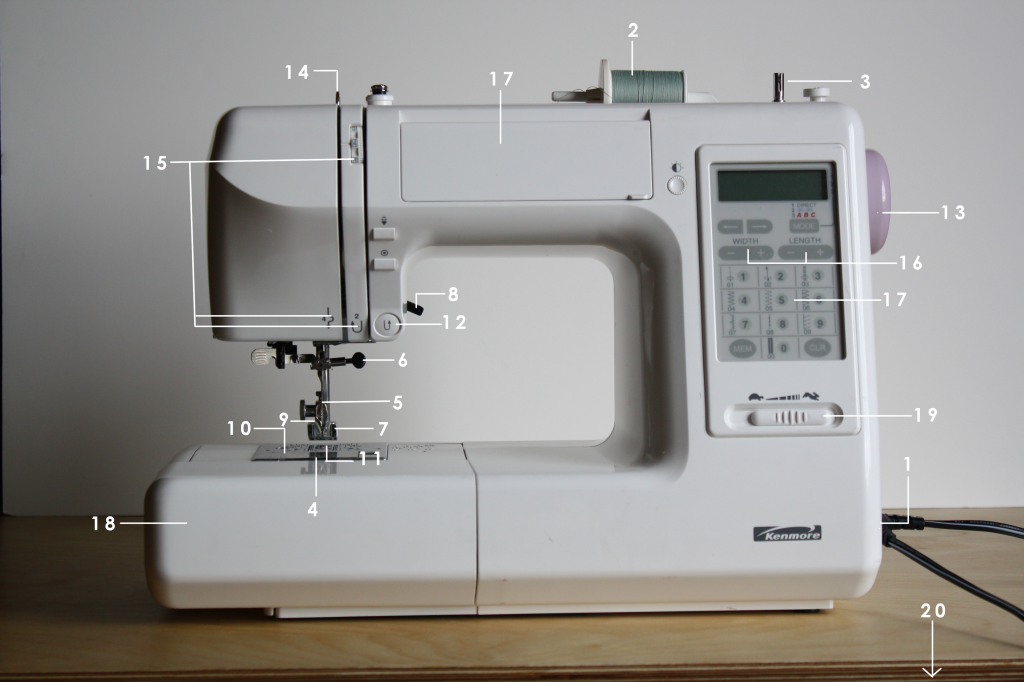
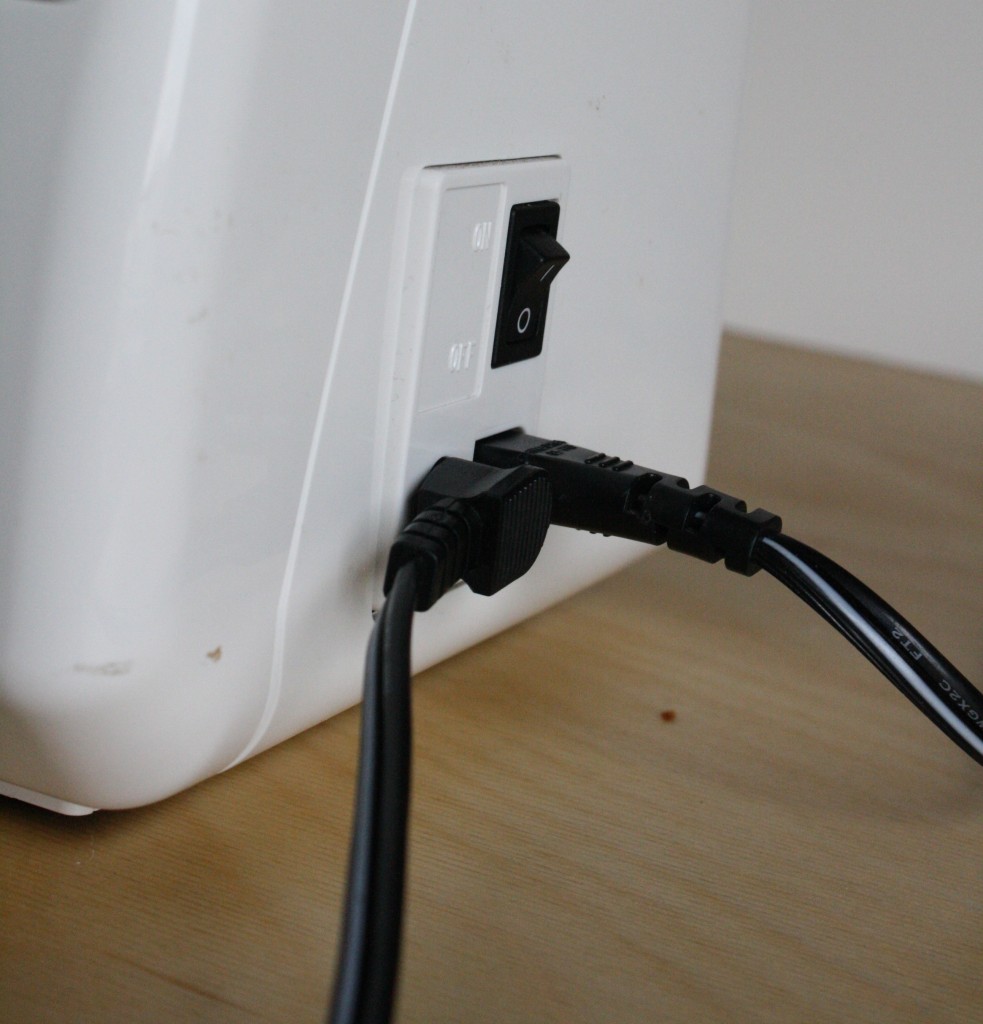
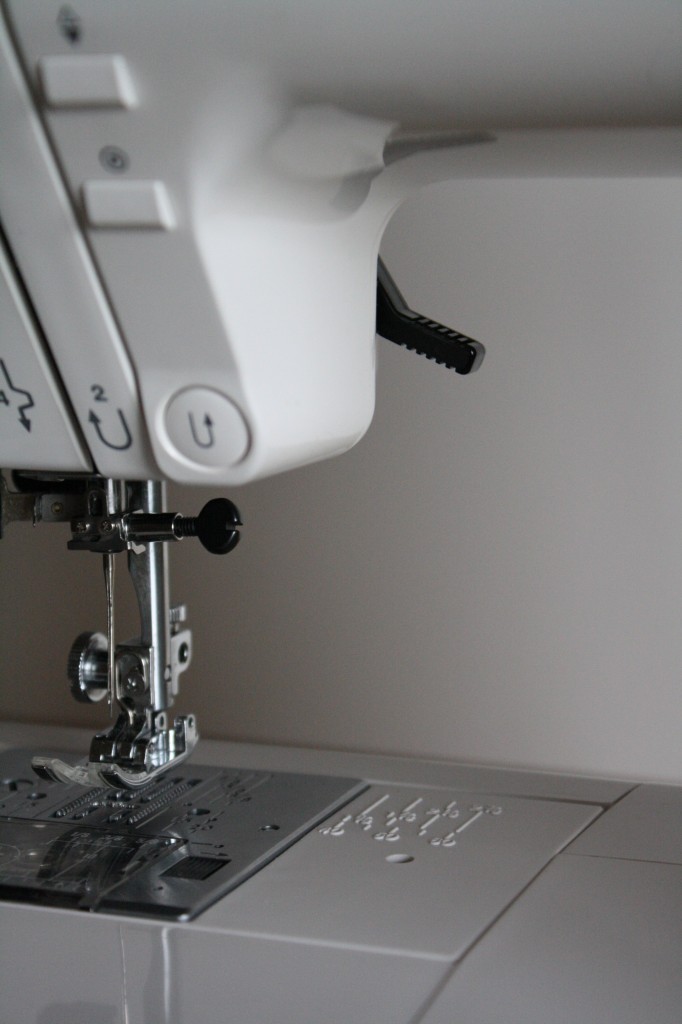
#1 the power switch
This is usually located on the lower right hand side of the machine and generally turns on a light bulb located above the needle.
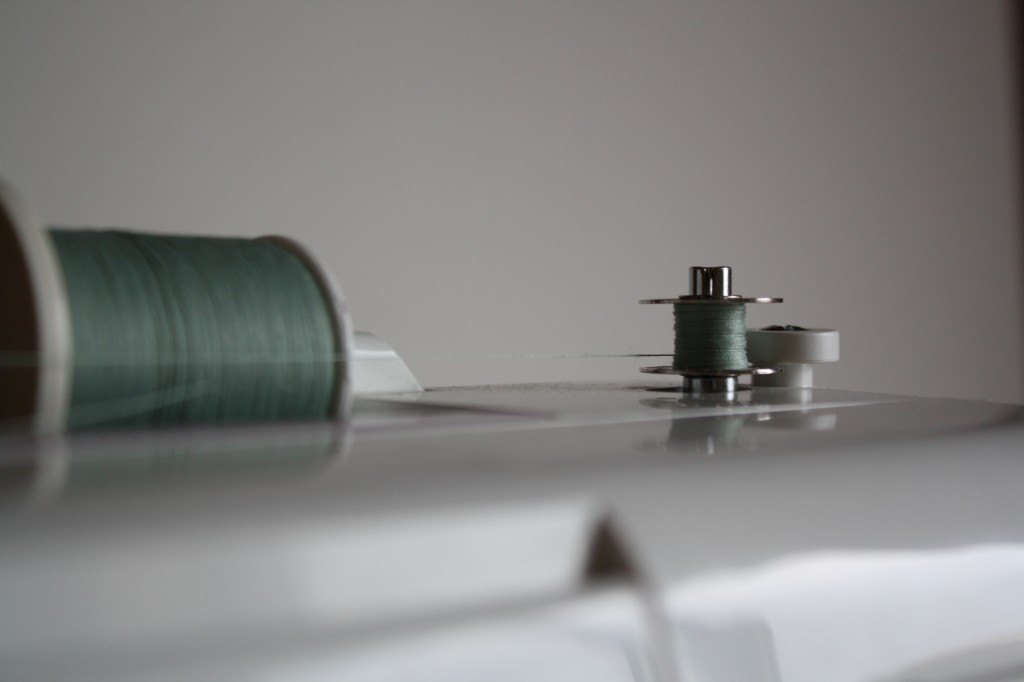
#2 the spool pin and cap
This is a small rod-like piece where you place your spool of thread.
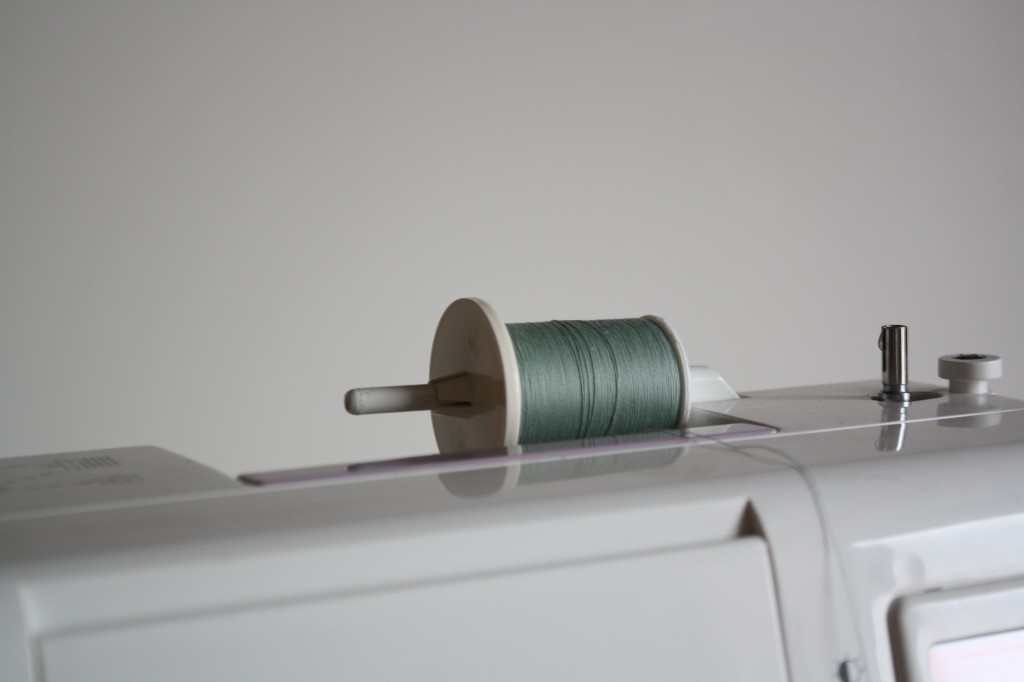
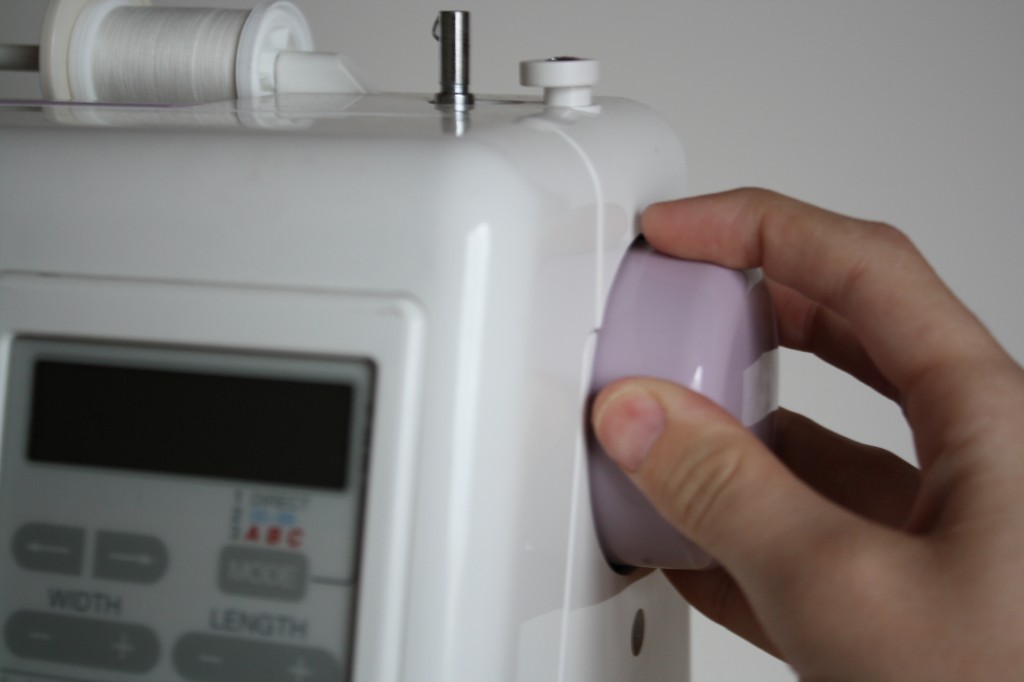
#3 the bobbin winder
This is where you thread your bobbin. Directions to do so are available in the next lesson.
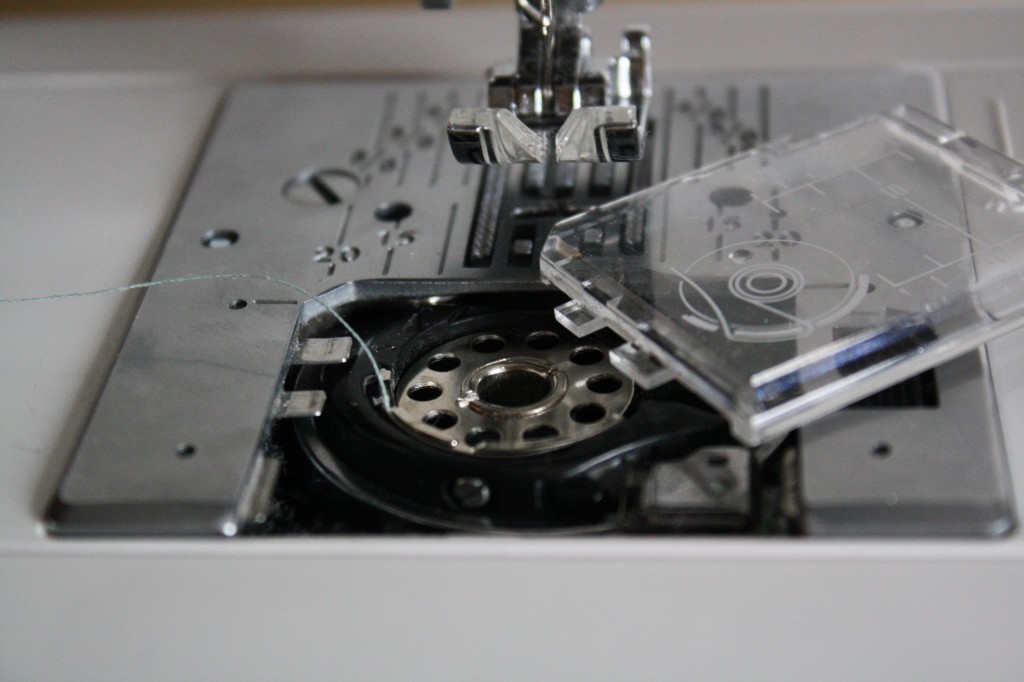
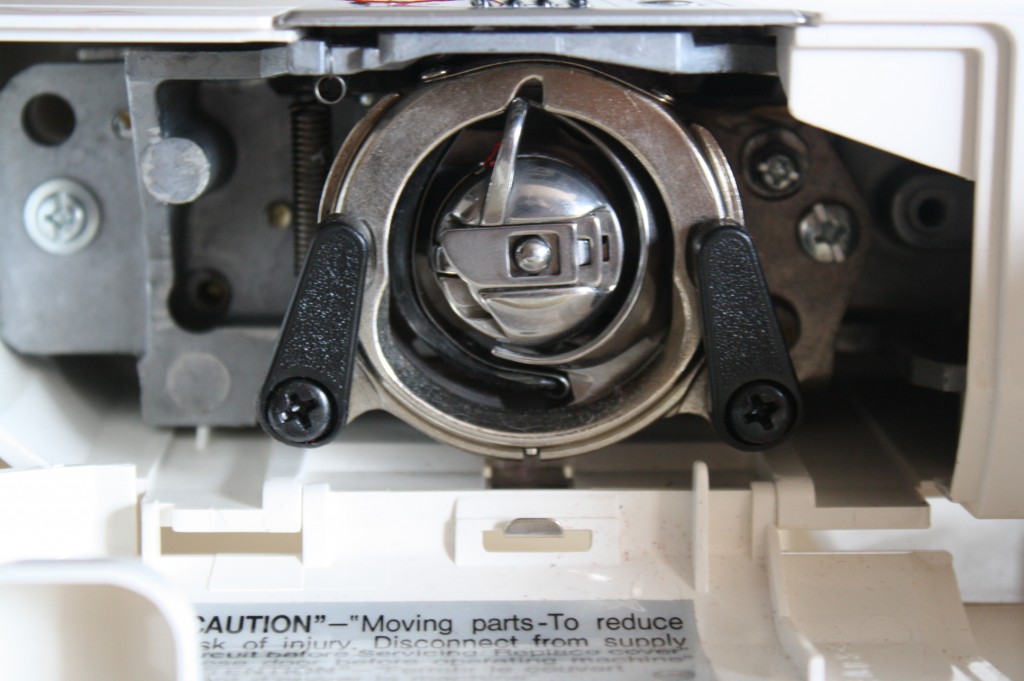
#4 the bobbin
The bobbin is the lower thread, wound on a small circular spool. My machine is top-loading, and no bobbin case is required. Many machines are front-loading and require a metal case, known as a bobbin case, to insert the bobbin into the machine.

#5 the needle
There are several different kinds of needles, used for different purposes, but the basic needle is known as the “Universal Needle”. It’s different than a hand needle in that the eye is at the tip, rather than at the wide end.

#6 the needle clamp
The needle clamp is found at the top right of the needle, and twists left and right. When loosed, the needle comes out and can be replaced with a different needle. When tightened the needle is secured in place.
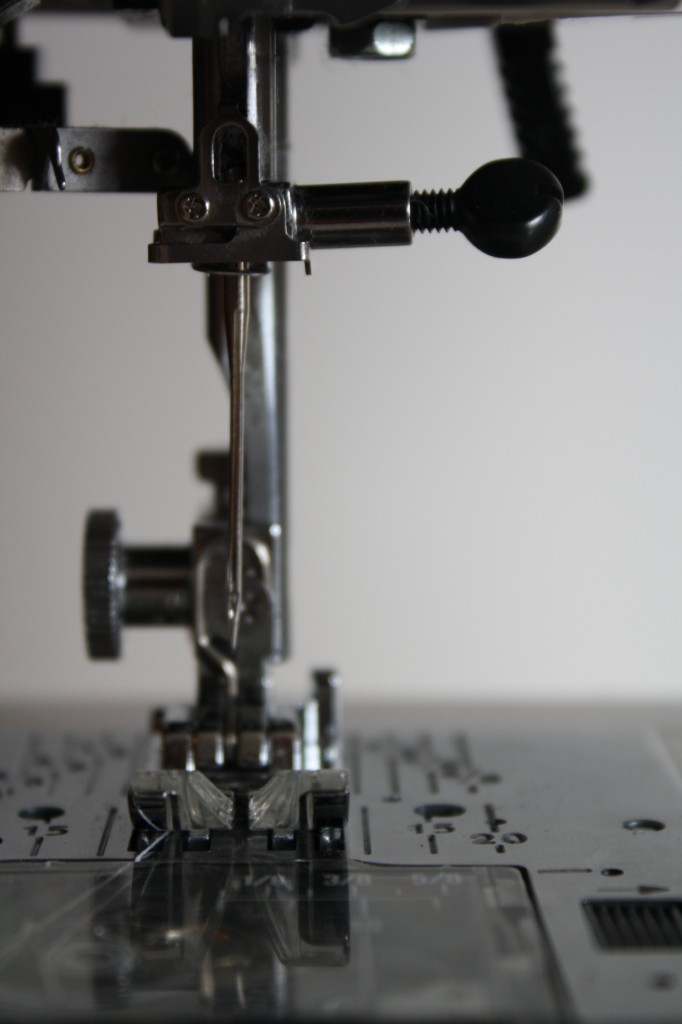
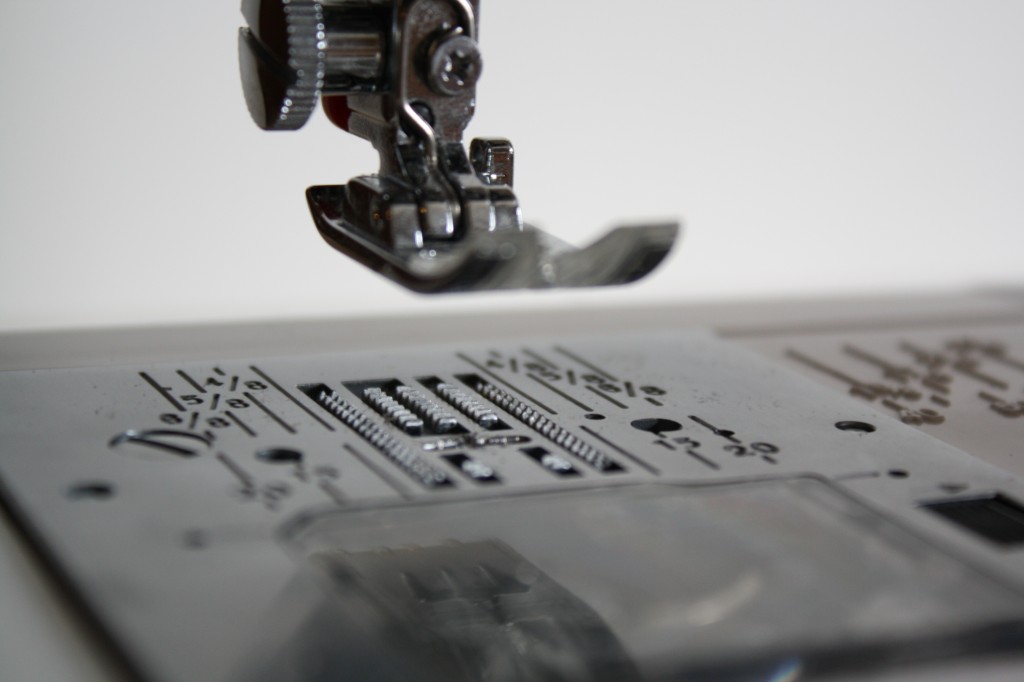
#7 the presser foot
Directly below the needle is the presser foot. The presser foot holds the fabric in place as you sew. Lift the presser foot to maneuver the fabric between stitchings, and LOWER the presser foot while sewing. There are many different presser feet used for different stitching tasks, such as: the zipper foot, the ribbon foot, the buttonhole foot, the gathering foot, etc. We’ll be using the standard presser foot in this sewing 101 course.
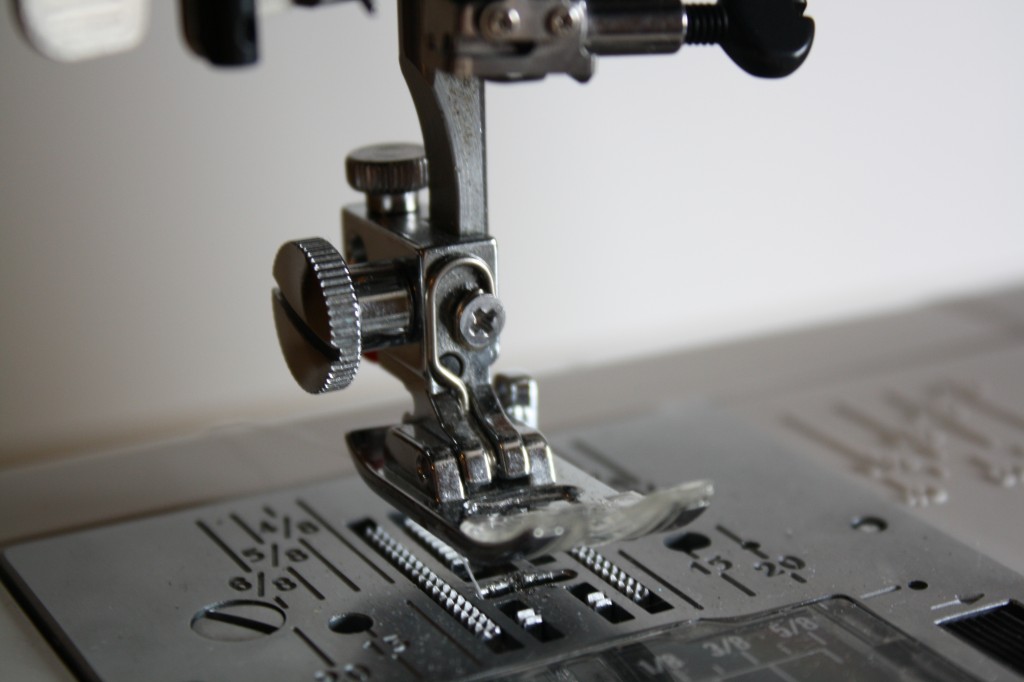
#8 the presser foot lifter
This is exactly what the name implies. Move the lifter up and down to lift and lower the presser foot. It is best to lift the presser foot while threading the machine, but always sew with the presser foot lowered.
#9 the presser foot release
This is not the same on every machine. On my machine the presser foot release is a little red button located behind the presser foot, on some machines you have to use a small screw driver to unscrew the presser foot and replace it with a different foot.
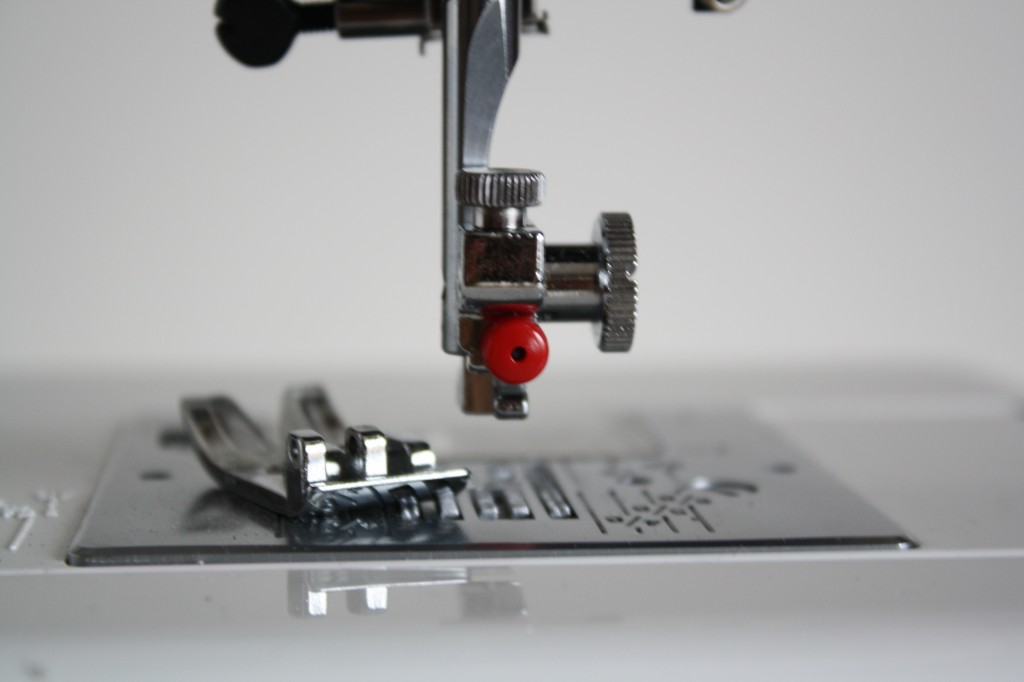
#10 the needle plate
The needle plate is the flat surface between the presser foot and the feed dogs where the needle moves up and down into. It is marked with measurements to help you guide as you sew to get the right seam allowance (1/4″, 5/8″, etc.)
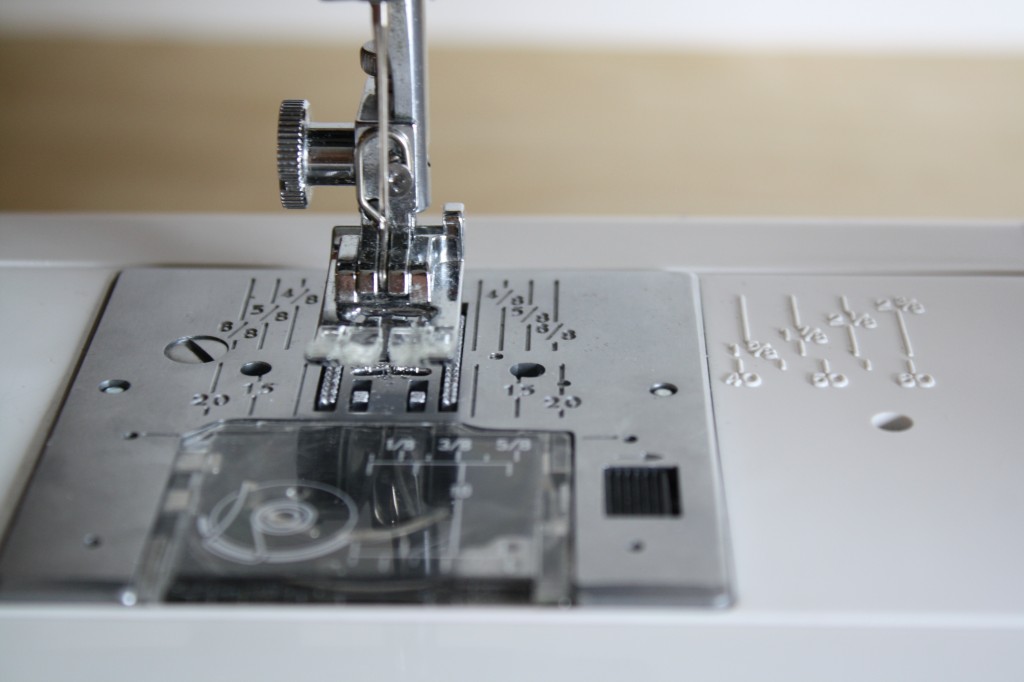
#11 the feed dogs
These are sharp metal teeth below the presser foot. When you begin to sew, the needle moves up and down, and the feed dogs rotate up and down, forward and back. If it weren’t for the feed dogs your fabric would stay in place and your needle would continue to penetrate the fabric in exactly the same place. The feed dogs are there to move the fabric along as you sew.
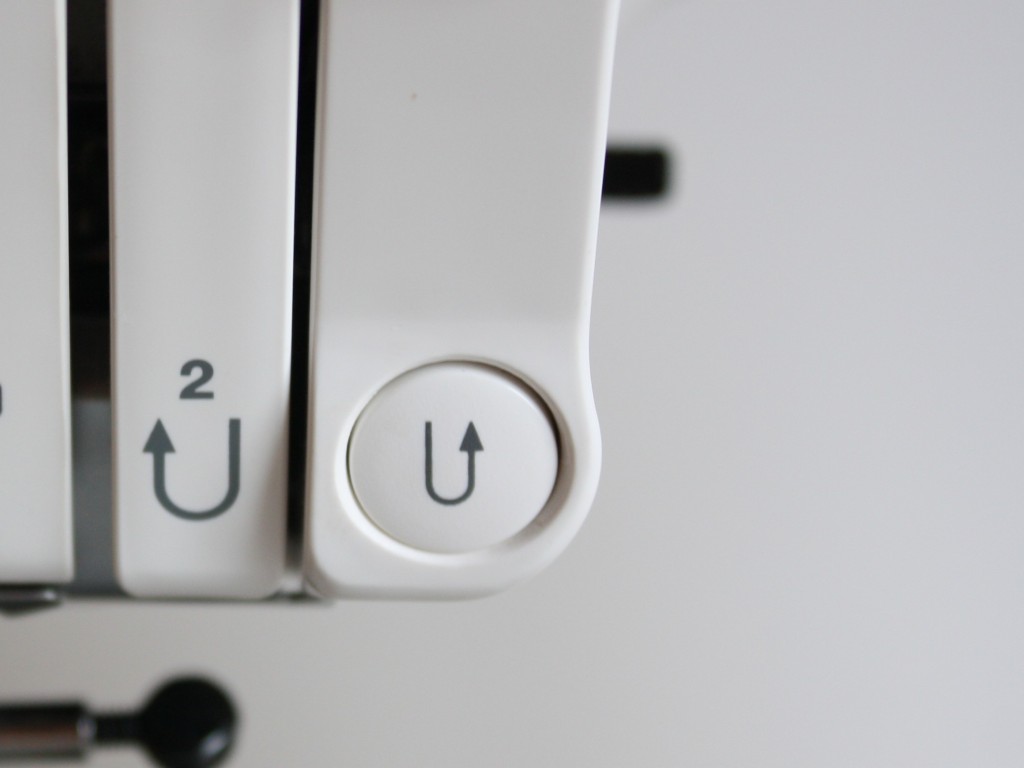
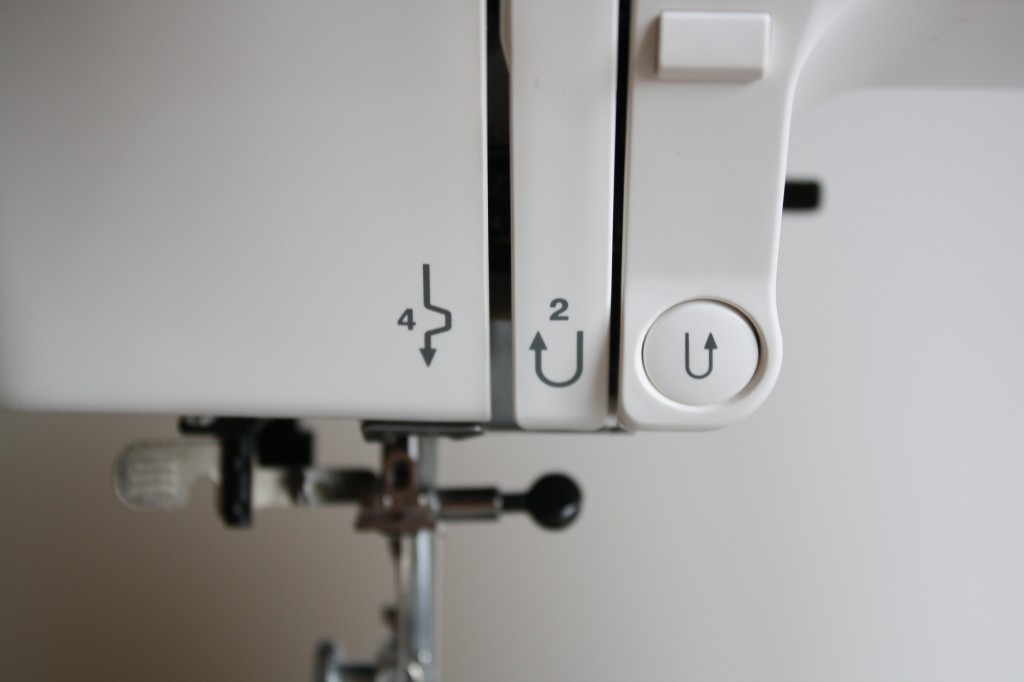
#12 the reverse button/ lever
This reverses the direction that the feed dogs rotate, and moves the fabric in the opposite direction to allow you to stitch backwards. This is usually used to back-stitch, which is reinforcing a stitch at the beginning and end of a seam.
#13 the hand wheel
This is a knob located on the right side of the machine. ALWAYS TURN THE KNOB TOWARDS YOU (counter clockwise). When you turn this knob it will move three parts of the machine: the needle, the feed dogs, and the thread uptake lever. This is typically used to move the needle and uptake lever for threading the machine, or to sew something one stitch at a time (you would do this if something needed to be done slowly and accurately, or to get over a bulky seam).
#14 the thread uptake lever
This lever moves up and down as you sew. It is part of the path your thread takes when you thread the machine. When you thread your machine, you’ll want to turn the hand wheel (#13) until this lever is visible as in the picture below so that you can thread through the hook. If you’re having trouble with your thread breaking, or your needle coming un-threaded as you sew, you may want to check to see if the uptake lever is properly threaded.

#15 the thread guides and tension
These thread guides are slots and hooks along the threading path. When the machine is not correctly threaded through these guides it will not stitch properly.
The tension wheel can be adjusted to change how tight the thread is held as you sew.
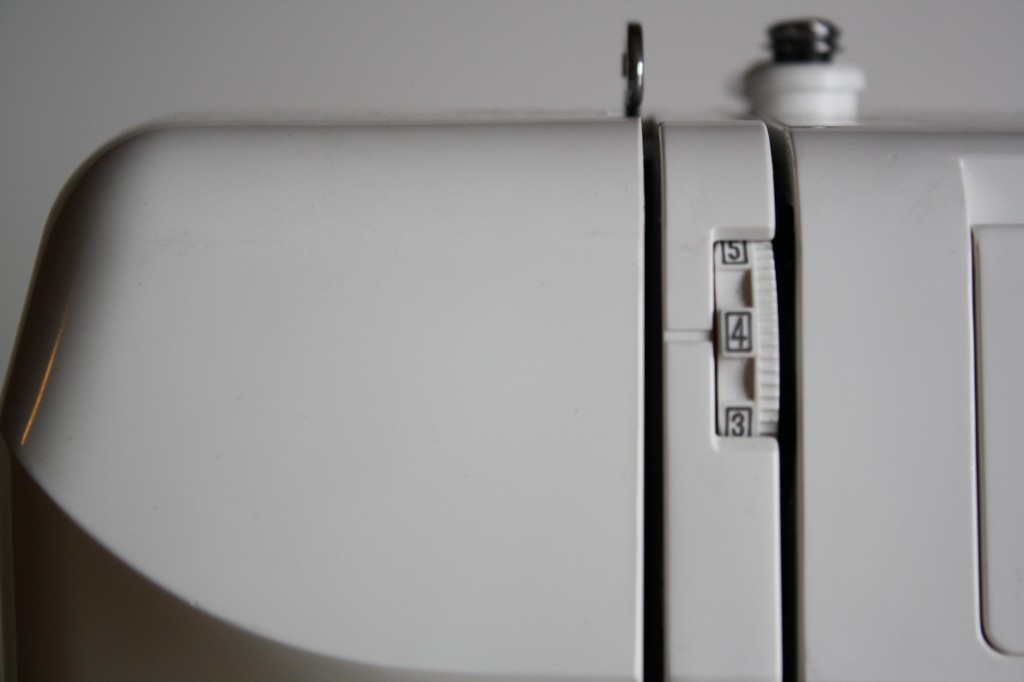
My machine indicates the standard tension by marking a box around the standard tension settings (3-5). Standard tension settings are generally the middle numbers. As you lower the tension to the smaller numbers your thread will loosen, and as you increase the tension to the higher numbers your thread will tighten and most likely begin to pucker your fabric.
#16 the stitch width and stitch length regulators
On my machine this is electronic, but on many machines the stitch width regulator is a lever or a knob.


When you adjust the stitch width smaller your stitch becomes narrow (left), and when you adjust the stitch width larger your stitch becomes wide (right).

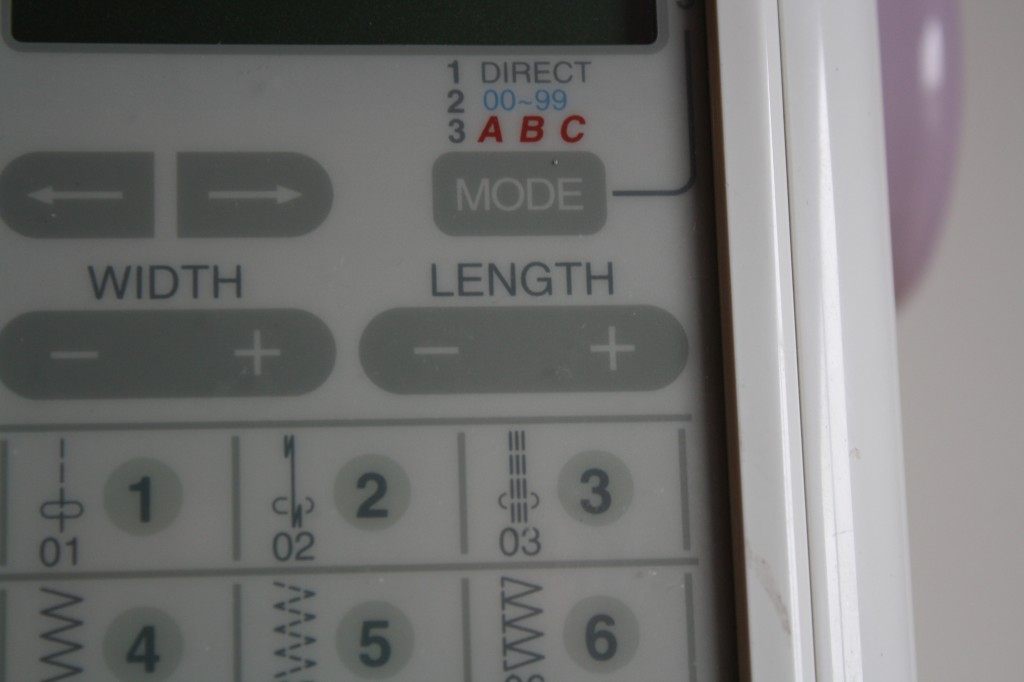
When you adjust the stitch length smaller your stitch becomes short (left), and when you adjust the stitch length larger your stitch becomes long (right).

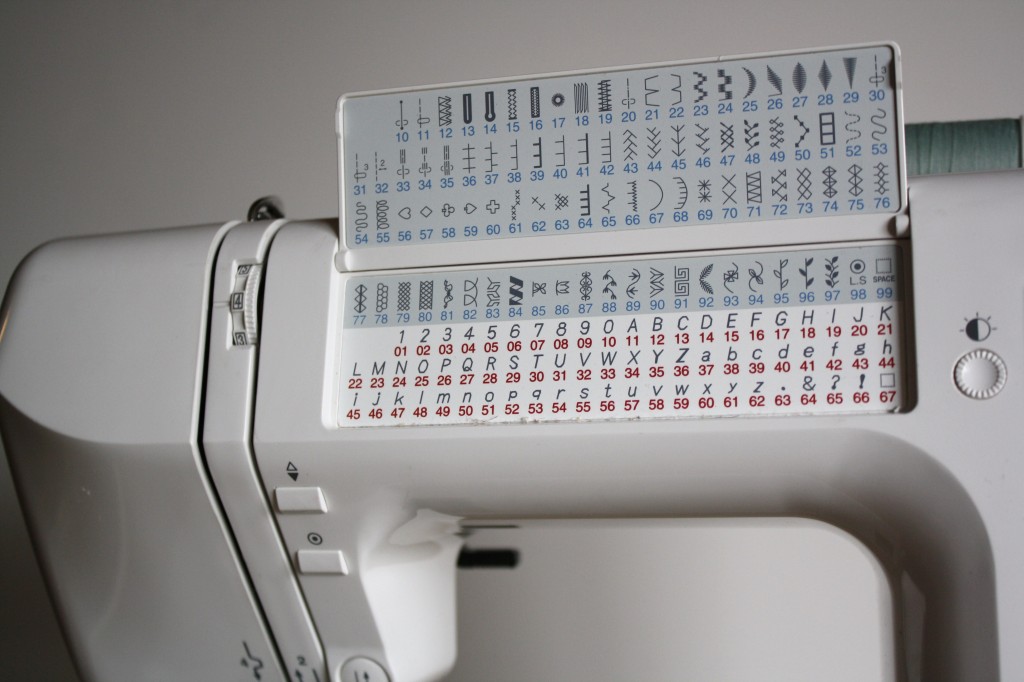
#17 the stitch selector
Some machines have specialty stitches such as the stretch stitch, the buttonhole stitch, or even decorative stitches.
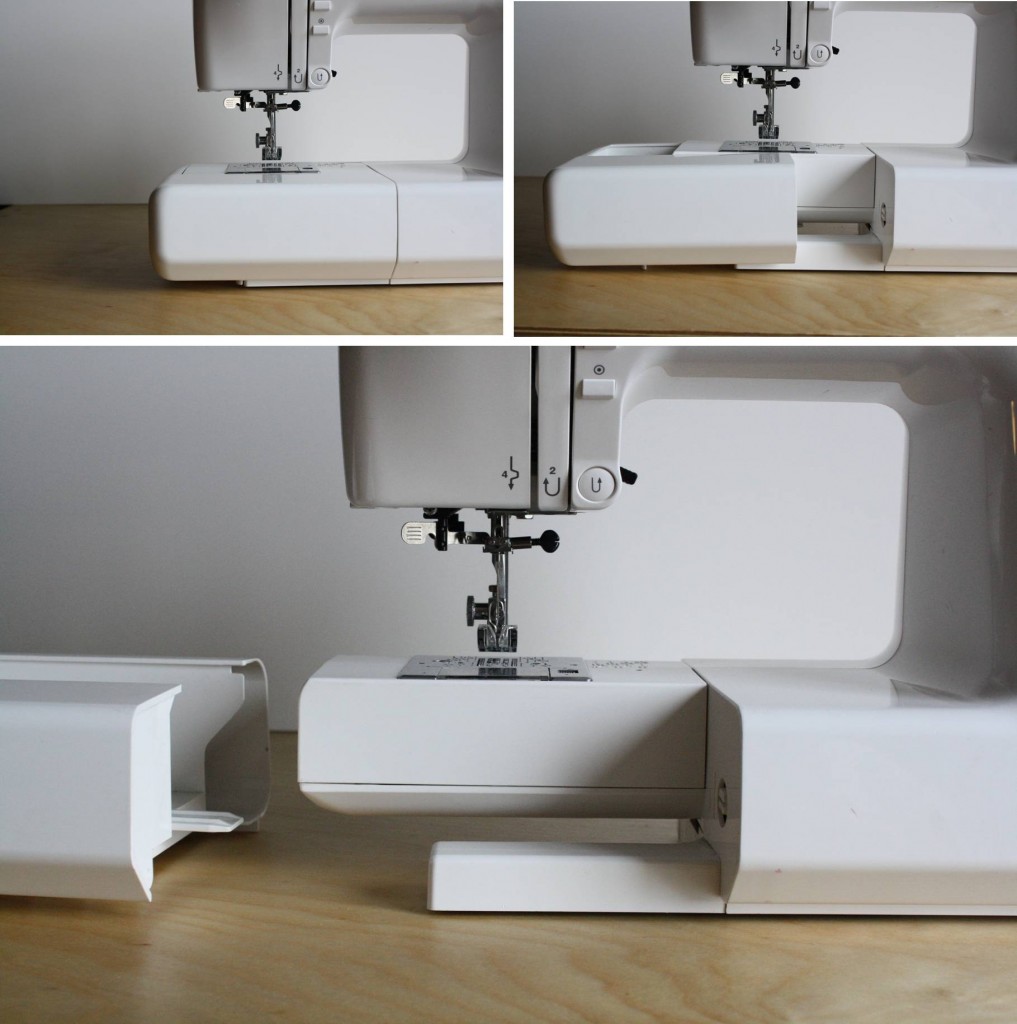
#18 the arm
On a lot of machines a part of the arm can be removed, mine slides off. This makes it easier to sew some awkward seams like sleeves.
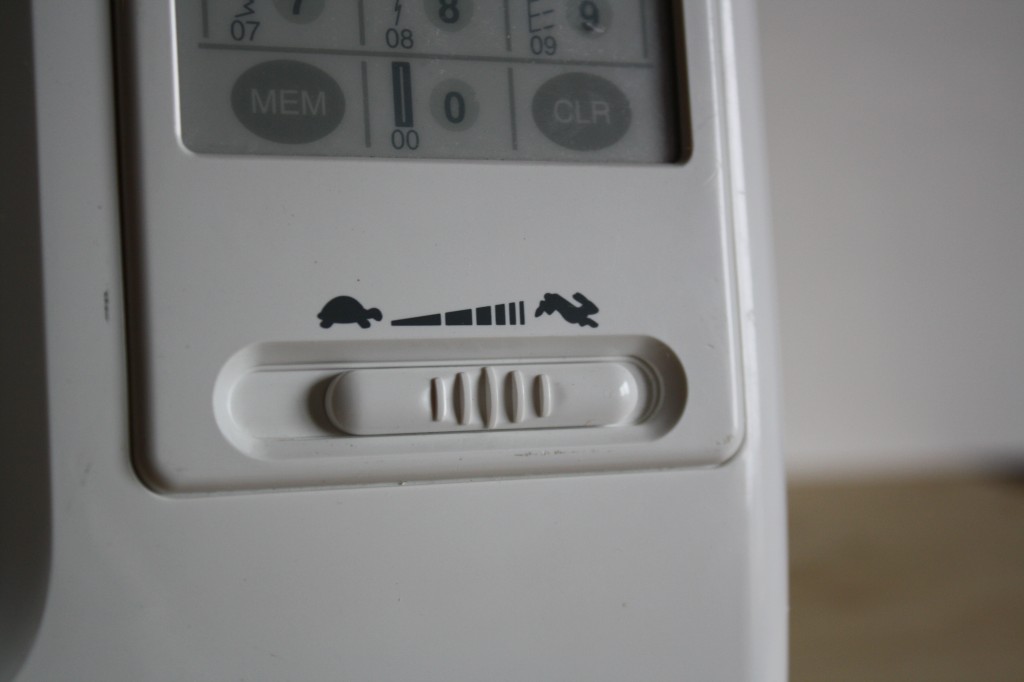
#19 the speed adjustment
Some sewing machines will have a lever to allow you to adjust the speed of the machine. For instance, if I set mine to a low speed, even pressing all the way down on the foot petal, the machine would sew slowly. This is great for beginners.
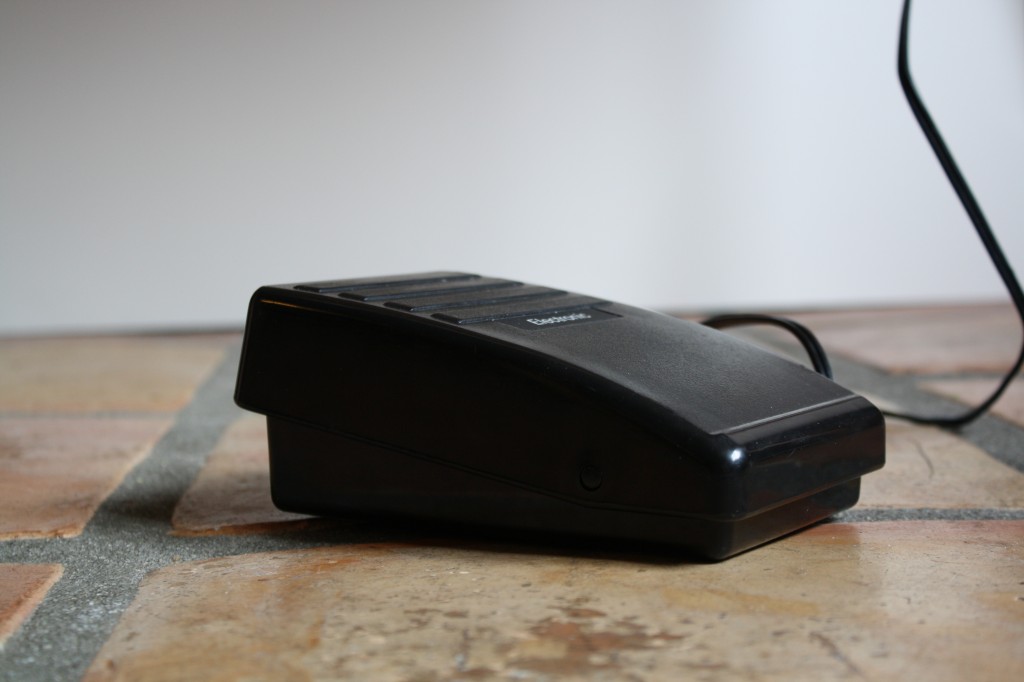
#20 the foot pedal
This is the pedal you press with your foot to make the sewing machine go. The more pressure you put on the foot pedal, the faster it will sew.
Knowing about the parts of the sewing machine, and how they work can help solve a lot of problems as you sew.
HOMEWORK
Practice labeling the parts of the sewing machine until you can name each part without looking at the answers!
nice
[…] control practice, remove the needle from the machine for safety reasons. To do so, loosen the needle clamp and pull the needle […]
[…] though, at least to some extent. So instead of making them learn all 20 parts we go over in the Introduction to Sewing Course, this lesson will only go over the 10 most basic […]
This is such a great post! I shared it with my readers on Facebook because many of them are just learning to sew and understand a sewing machine. Thank you for sharing!
I’m glad you thought it’d be helpful! I love that sewing is a skill that can be self-taught.
I am very thankful for what this system has thought me I gave all my answers and I will practise harder.
hied
There are some attention-grabbing time limits on this article but I don’t know if I see all of them middle to heart. There is some validity however I’ll take hold opinion till I look into it further. Good article , thanks and we wish extra! Added to FeedBurner as well
My brother SQ9125.. The foot pedal will not work it’s only 3 yrs old… But has only been used a few times recently… Help!!!