With a hand-stitched spiral shell, this little guy has more charm than he does speed. With your choice of fabric, ribbon, and thread, he really will be all yours.
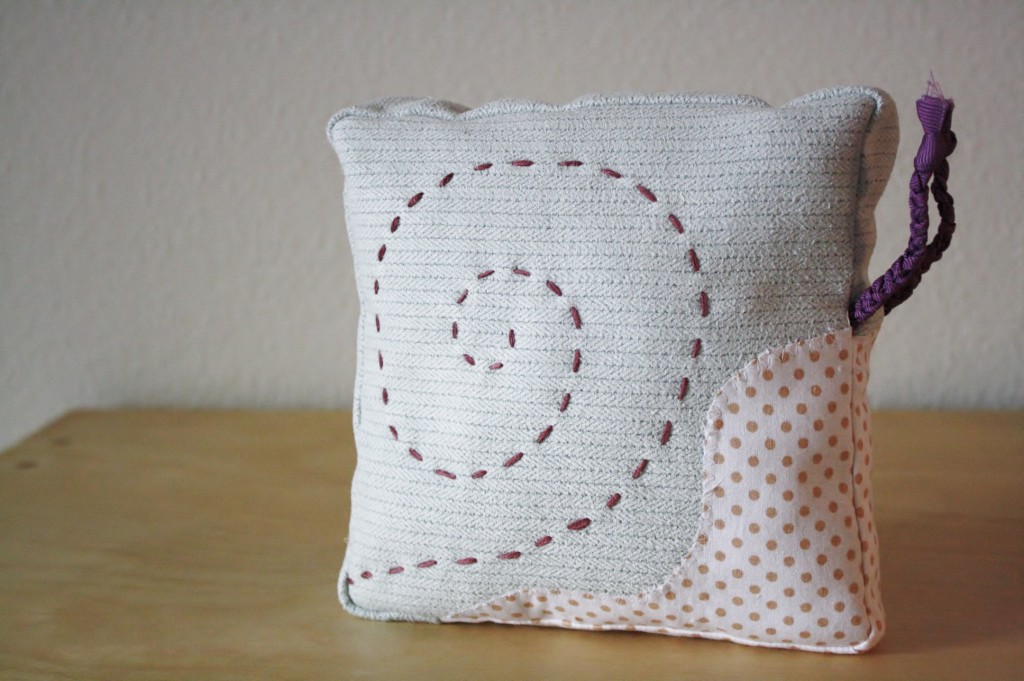
MATERIALS NEEDED
PDF pattern pieces
scrap materials of 2 contrasting fabrics (see pattern pieces for measurements)
matching thread
embroidery floss (for the spiral)
fiber fill or scrap fabrics strips for stuffing
1 1/2 yds. ribbon for antennas
CUT OUT THE PIECES/ CUTTING LAYOUT
Print out the Printable Pattern Pieces. Cut the shell and the longer side piece from your “shell” fabric. Cut the body and shorter side piece from a contrasting fabric. Cut 6 strips of ribbon 8″ each.
INSTRUCTIONS
3/8″ seam allowance (guiding on the outer edge of the presser foot)
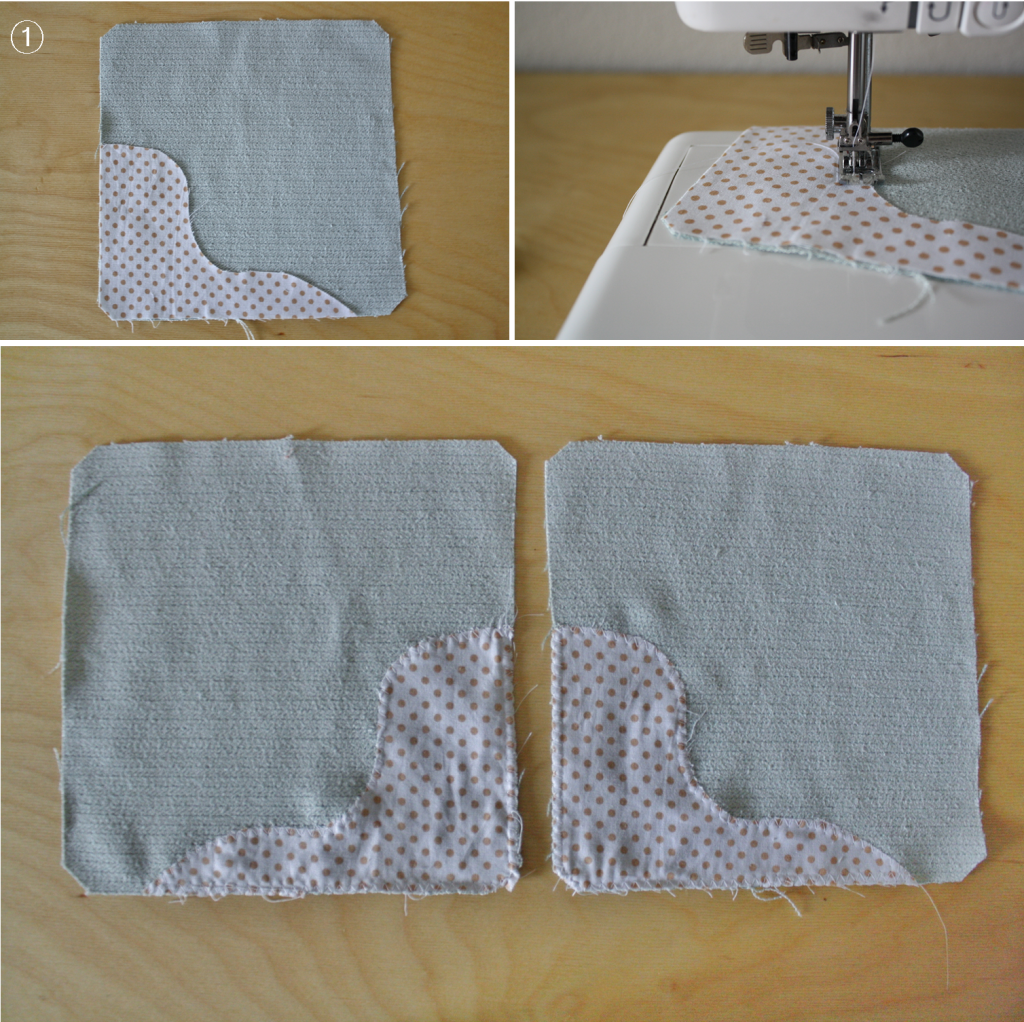
① Lay the body and shell pieces out with right-sides up, and line the body pieces on top of the shells, matching the notches, and pin them in place. Zig zag around the edges of the body to applique them to the shell pieces.
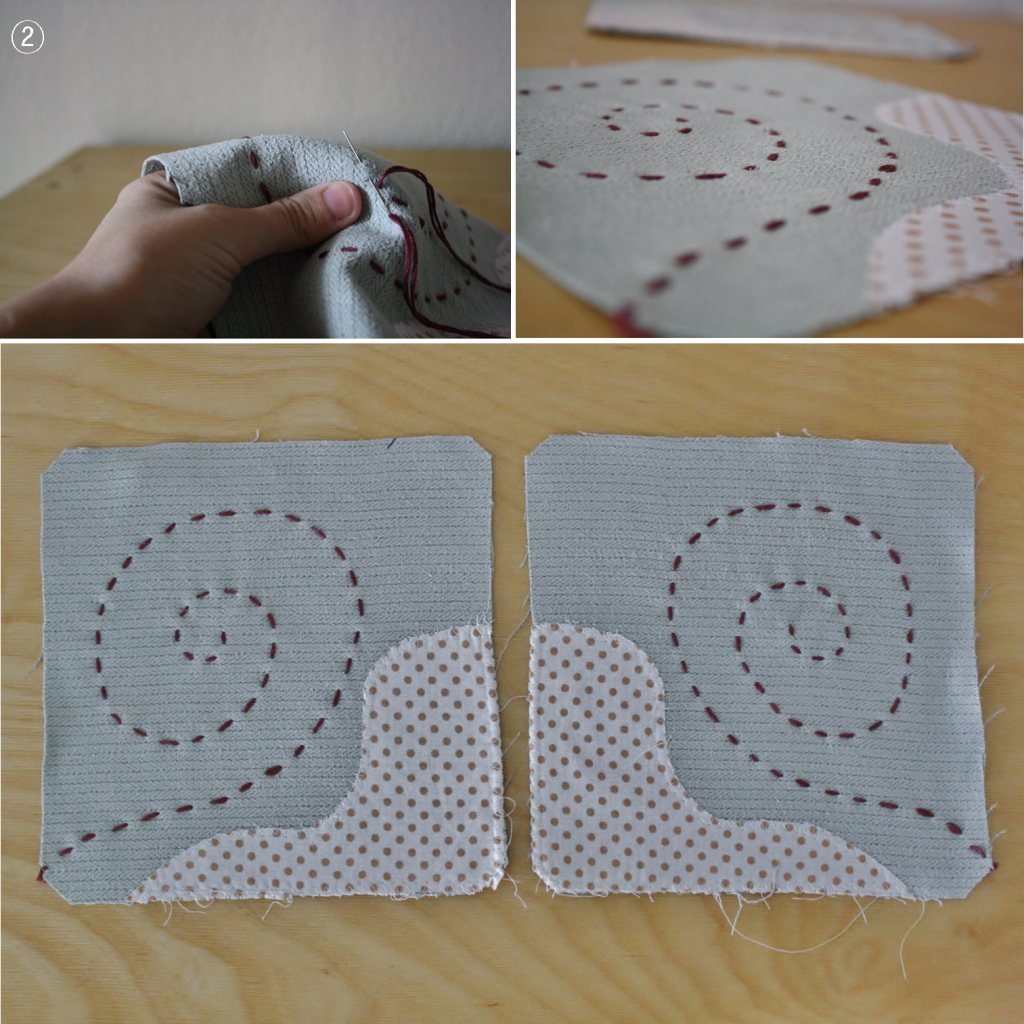
② Hand stitch the spiral with embroidery floss using a quick running stitch.
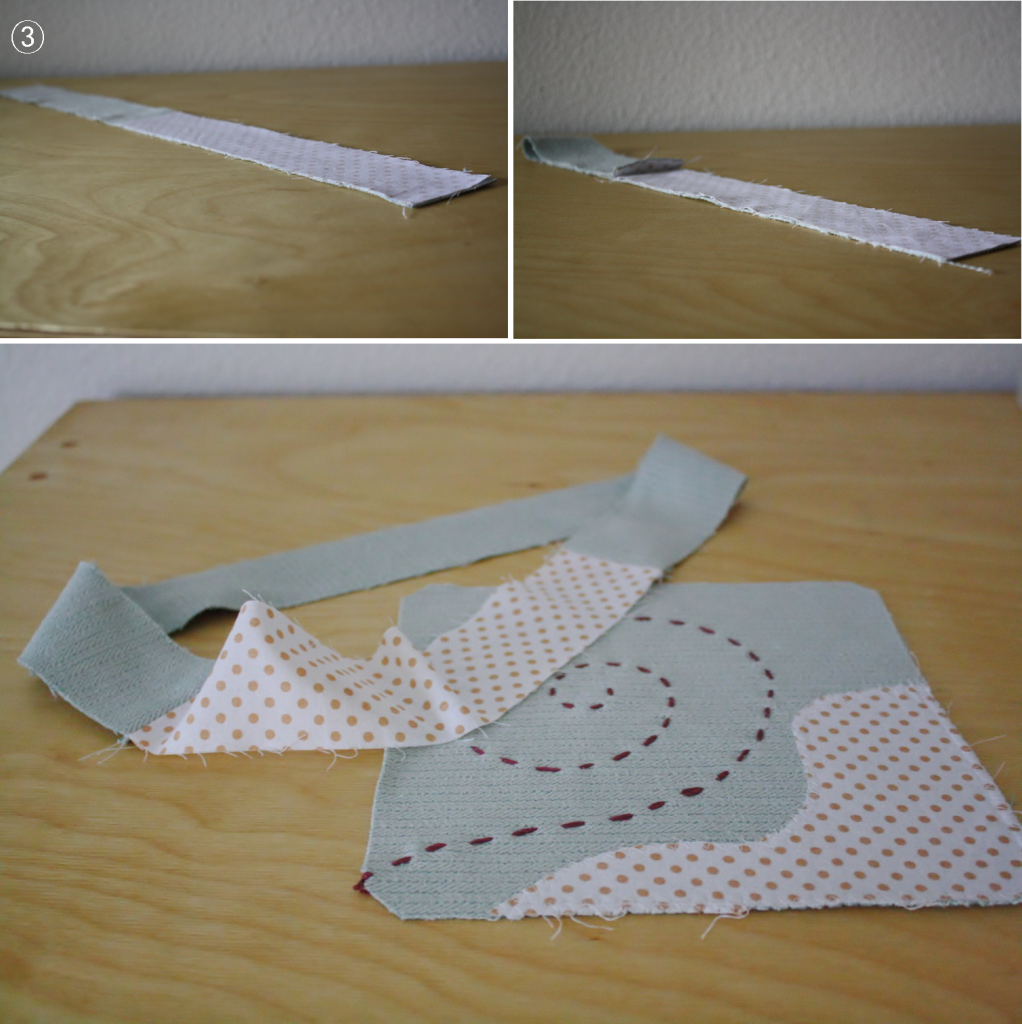
③ Line the side pieces up with right-sides-together and stitch down one end to make a larger strip. Fold the side piece in half with right-sides-together and sew the ends together to create a tube. Press both seams open.
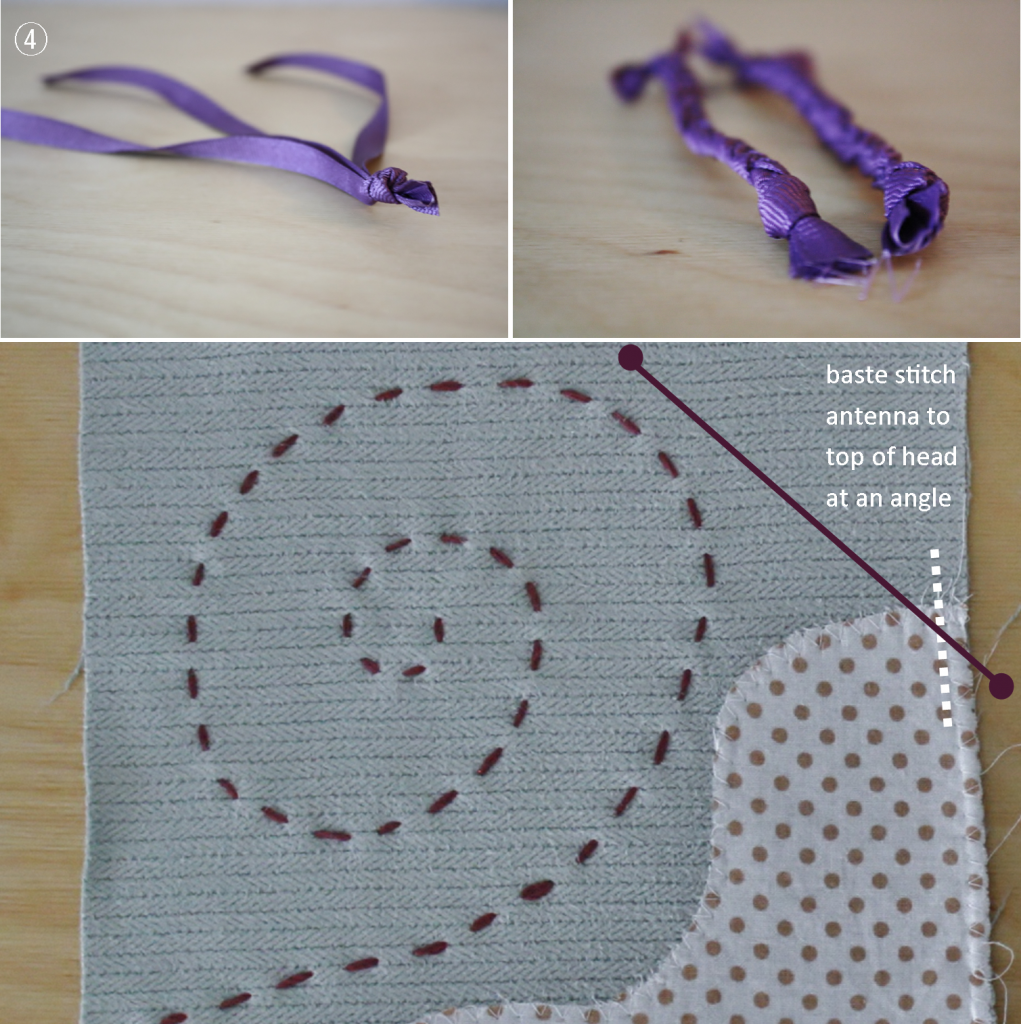
④ Tie 3 pieces of ribbon together at the end, braid very tightly (the tighter you braid, the stiffer the antennas will be), and tie it off on the other end. Make two antennas this way. I accidentally skipped this step when I was putting together this tutorial, so my pictures don’t reflect it well, but before you sew the side piece to the body, pin each antenna to the tops of the head pieces at an angle, and stitch in place right near the edge. This will hold the antenna in place for easy sewing in the next steps.
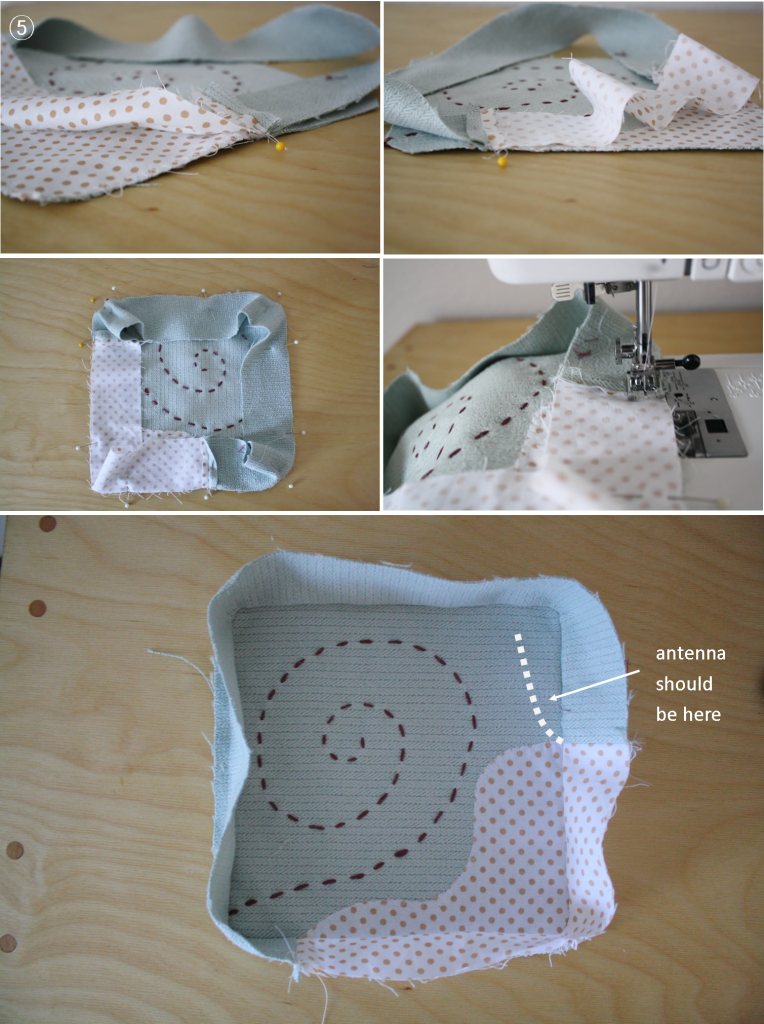
⑤ Pin the side piece to one body piece with right-sides-together. Be sure to line the edges of each color correctly so it all matches up when it’s sewn. Sew around all 4 sides. If you need help with how to sew around these corners, refer to step 11 in THIS TUTORIAL. Remember, I accidentally skipped step 4 when photographing this tutorial, so you should see the antenna at the top of the snail head on the right side!

⑥ Pin the back body piece to the raw edge of the side piece, with right-sides-together, lining the seams of the side piece with the body/shell. Sew around the edges, leaving a 3″ opening.

⑦ Turn the snail right side out and stuff with fiber fill or scrap fabrics. Stitch the opening closed.
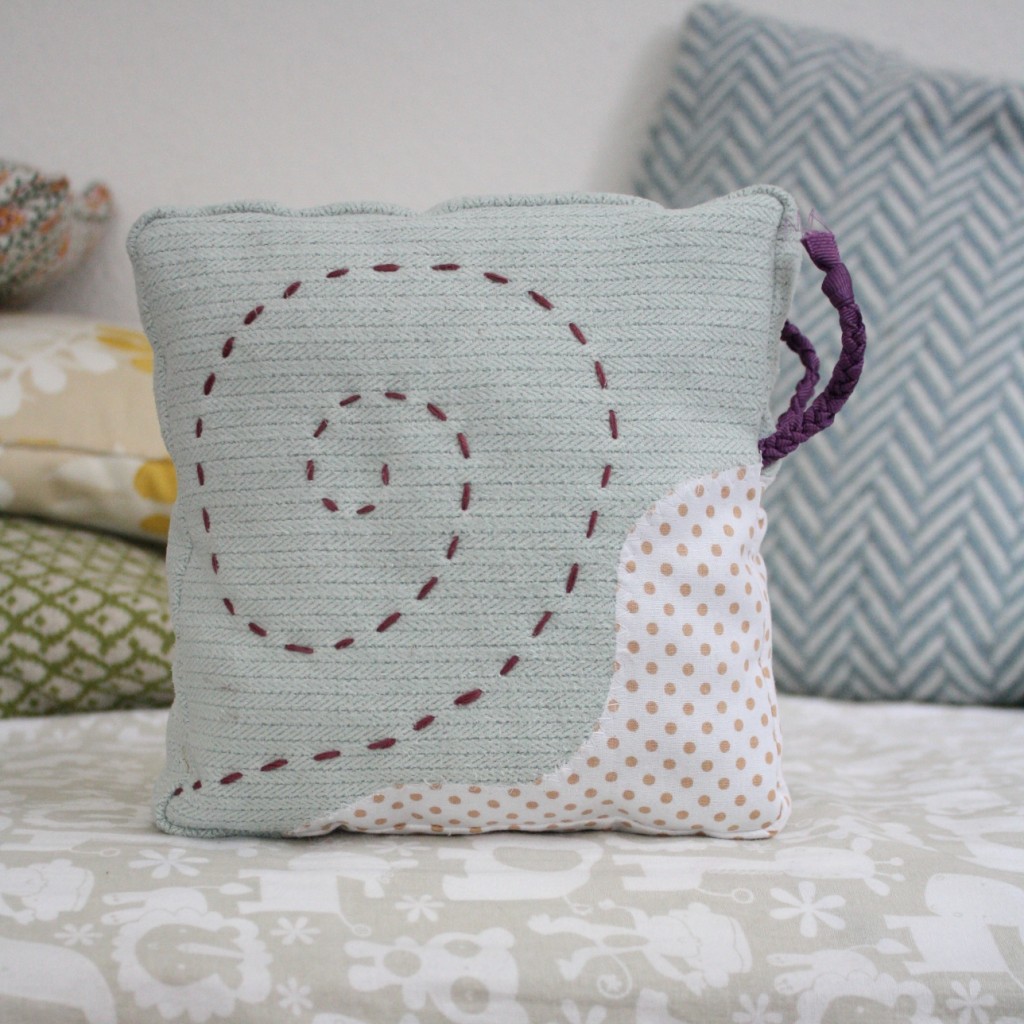
And that’s all there is to it. You should have a sweet and squishy snail in no time!
This is very cute! Thanks for sharing.
Donna @onceuponasewingmachine.com
This pillow is beautiful. I have a link party called Wednesdays Adorned From Above Link Party and would love to have you share this with everyone. Here is the link to the party.
http://www.adornedfromabove.com/2012/11/mason-jar-center-piece-and-wednesdays.html
Debi @ Adorned From Above
Hi my loved one! I want to say that this post is amazing,
nice written and include almost all vital infos. I would like to peer more posts like this .
I love this sooo much! Wish I knew how to sew!
Oh my gosh! That is adorable!
I’d love for you to link this up to my Show & Tell party. http://www.gingerlymade.com/2012/11/show-and-tell-3.html
Incredible! This blog looks just like my old one! It’s on a entirely different subject but it has pretty much the same page layout and design. Superb choice of colors!